


Interactive First Aid Book for Children
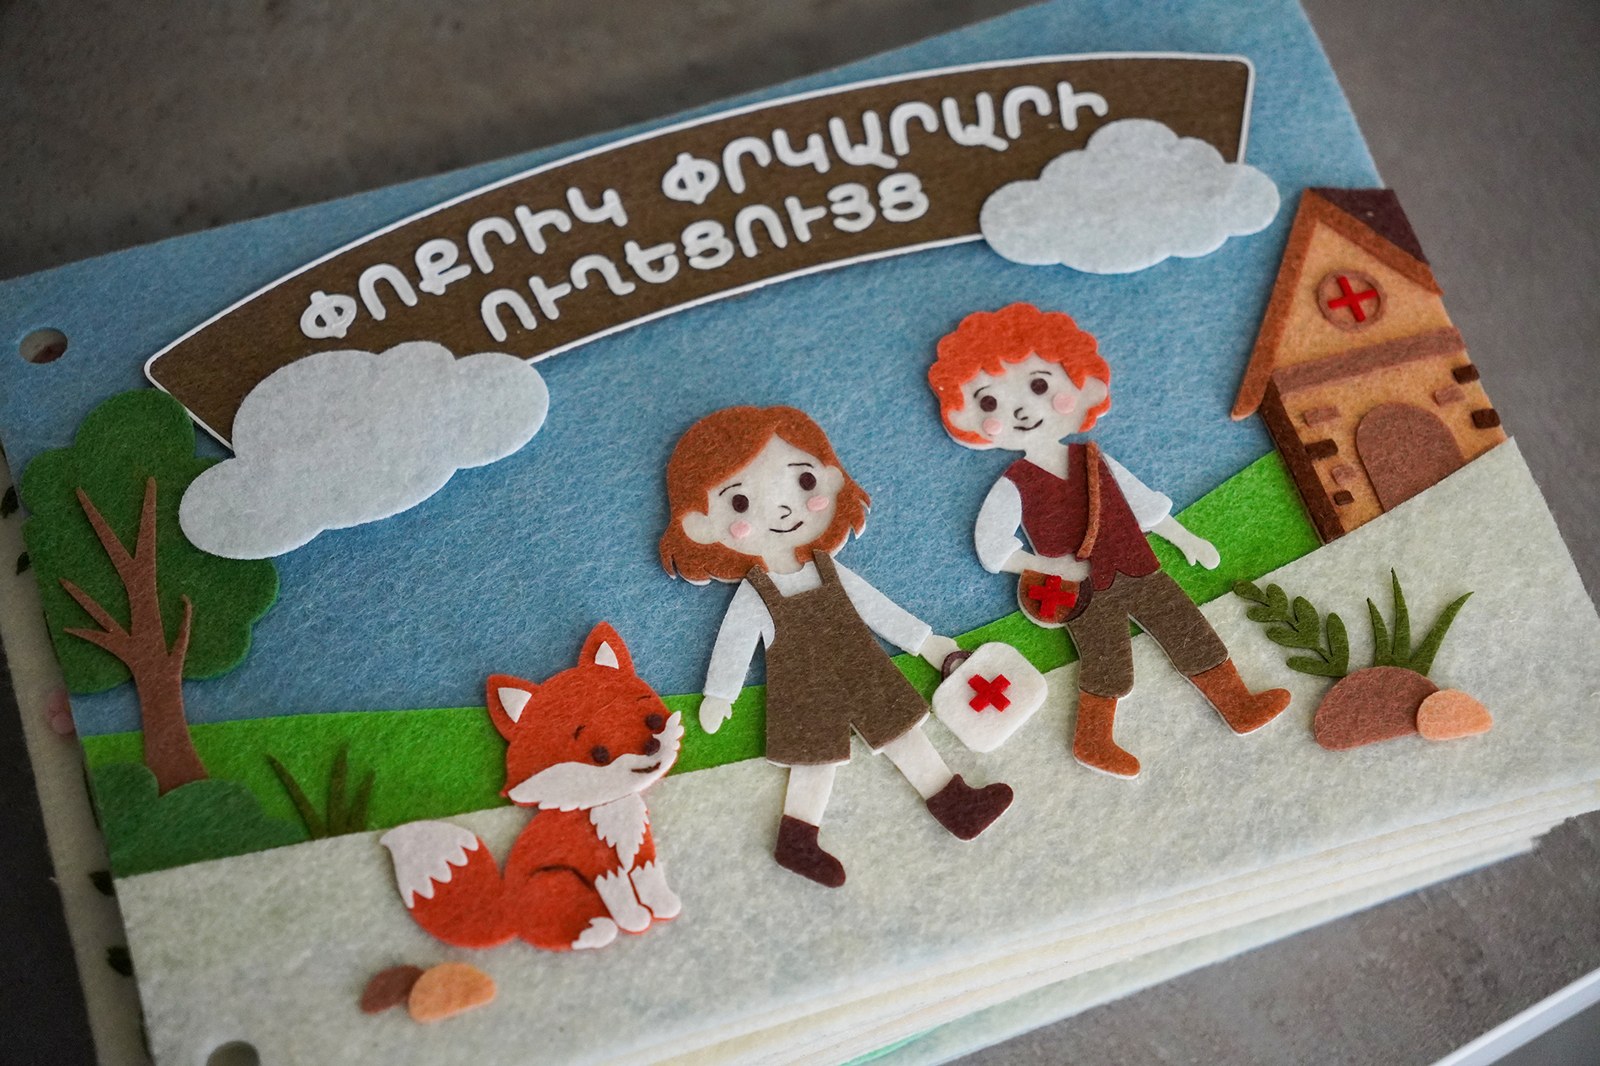
A Little Rescuer’s Guide (Փոքրիկ փրկարարի ուղեցույց) is a handmade educational project designed to introduce children to basic first-aid knowledge through tactile exploration and hands-on activities.
1. Project Overview
A Little Rescuer’s Guide (Փոքրիկ փրկարարի ուղեցույց) is a handmade educational project designed to introduce children to basic first-aid knowledge through tactile exploration and hands-on activities.
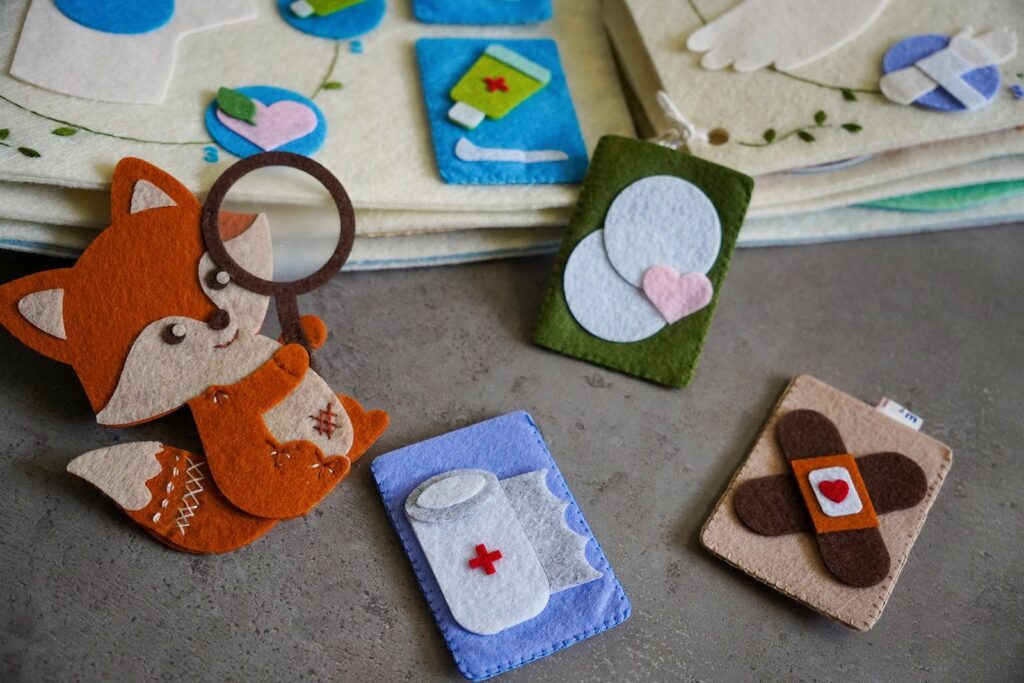
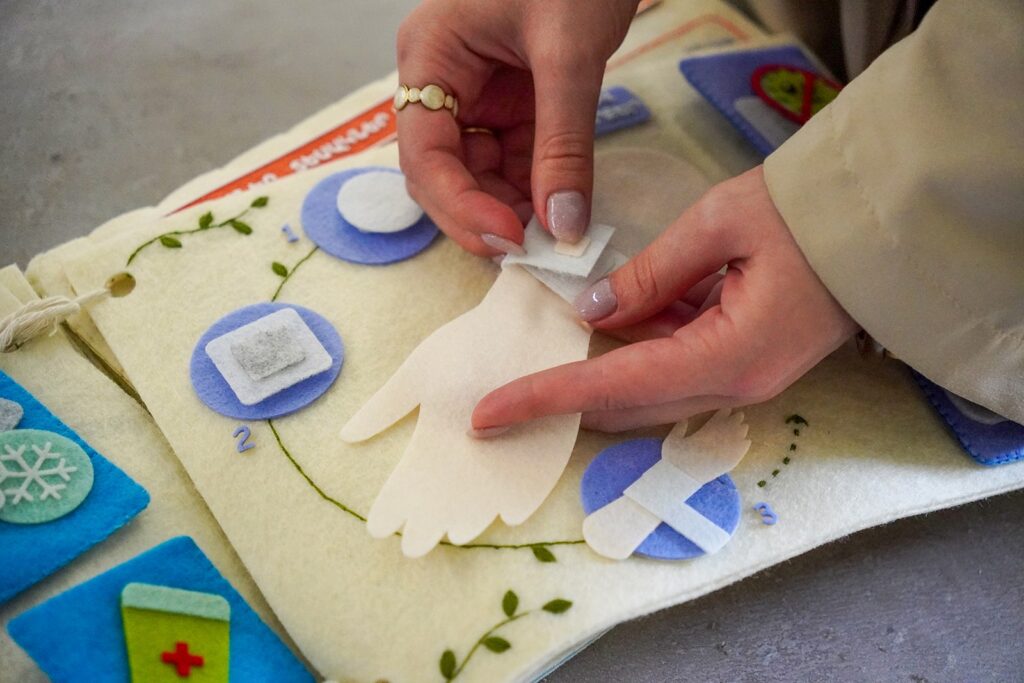
The original book is made from felt and combines textile craftsmanship with educational design. Its pages feature colorful illustrations, hand embroidery, appliqué, and 3D-printed elements integrated into the fabric, creating an engaging, interactive learning experience.
Project Goals
- Introduce children to basic first-aid knowledge through interactive learning.
- Encourage exploration through touch, observation, and play.
- Combine traditional textile crafts with digital fabrication.
- Demonstrate how handmade educational objects can support learning.
- Provide an adaptable resource for makers, designers, educators, and families.
2. Concept and Interaction
The concept transforms a traditional book into a tactile educational object. Each page features handmade felt illustrations, using embroidery and appliqué to bring the content to life through color, texture, and detail.
Interactive elements encourage children to engage directly with the pages, explore first-aid scenarios, and learn through play. The combination of textile techniques and 3D-printed details demonstrates how traditional craftsmanship and digital fabrication can work together to create meaningful educational experiences.
3. Documentation and Adaptable Version
Although the original book is a handcrafted textile project, this documentation provides an adapted version that is easier to reproduce and accessible to a wider audience.
Creating the complete felt version requires embroidery and appliqué skills, which may present a challenge for beginners. The adapted version simplifies the process by providing scanned and printable page layouts, together with EPS files containing the interactive elements for laser cutting.
This approach allows you to recreate the book without needing advanced textile craftsmanship while preserving its original educational concept.
The documentation is intended for educational workshops, classroom activities, Fab Lab environments, and personal use. The provided resources can also serve as a starting point for developing your own variations.
Note on image restoration: Some scanned pages have been enhanced using AI to improve color, texture, and visual clarity where the original scans lacked detail. These enhancements are purely visual; the original content, illustrations, and page layouts have not been intentionally changed.
4. Getting Started
The original book is written in Armenian, but the downloadable page layouts can be adapted to other languages.
You can use image-editing software, such as Adobe Photoshop, or AI-assisted tools to replace the Armenian titles and text with your preferred language. Review the edited pages carefully to ensure that the new text fits the layout and that the instructions remain accurate.
Available Files
The following resources will be provided below:
- Printable version: Page layouts ready to print.
- EPS files: Vector files for laser-cutting the interactive elements.
Download the files and prepare the materials before proceeding to the fabrication instructions.
5. Materials and Tools
Materials for the Book
- Felt sheets in different colors
- Embroidery threads, preferably in a variety of colors
- Sewing needle
- PVA glue or fabric glue
- Self-adhesive square hook-and-loop fasteners for attaching removable elements
Tools
- Scissors
- Computer with suitable design or image-editing software
- Printer
- Laser cutter for the supplied EPS files, where appropriate
First-Aid Items
The following items are used in the interactive first-aid kit section of the book:
- Cotton pads
- Adhesive plasters
- Sterile surgical dressing
- Heparin ointment (small tube)
- Cold pack
- Sterile gauze pads
Safety note: Any real medical supplies included in the book should be handled appropriately and kept under adult supervision. Sharp or potentially hazardous items should not be accessible to children. Check all first-aid information against reliable guidance before using the book for educational activities.
Preparing the Cover
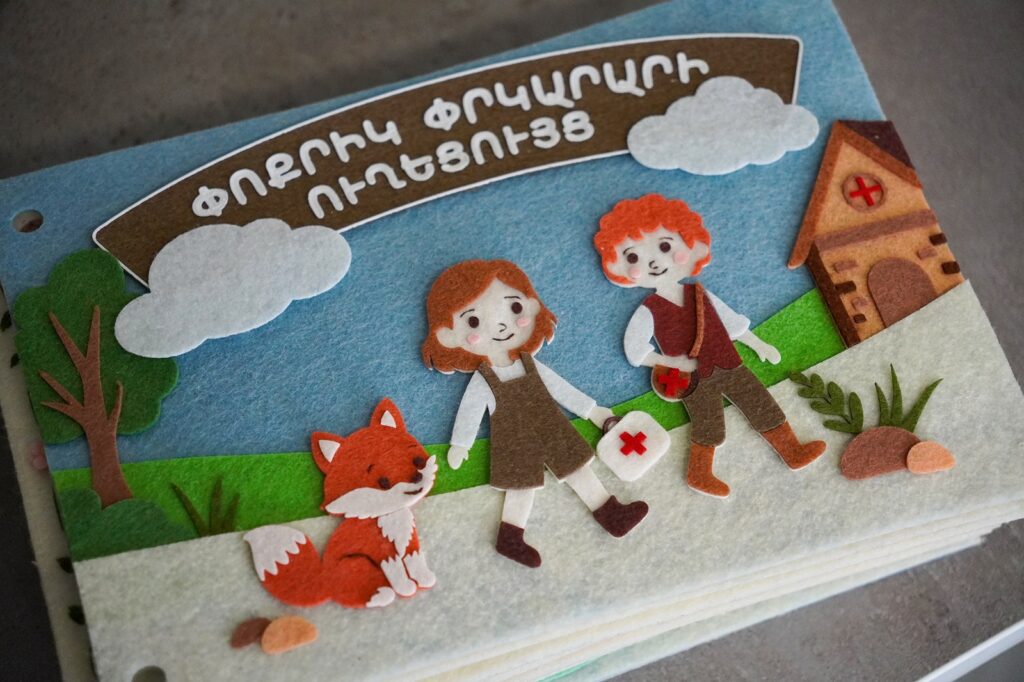
The cover is ready to print. Download the cover file and print it to use it in your book.

The original title, Փոքրիկ փրկարարի ուղեցույց (A Little Rescuer’s Guide), is in Armenian. If you want to adapt the book to another language, you can edit the title using software such as Adobe Photoshop or AI-assisted image-editing tools. Replace the original title, adjust the text to fit the design, and print the adapted version.
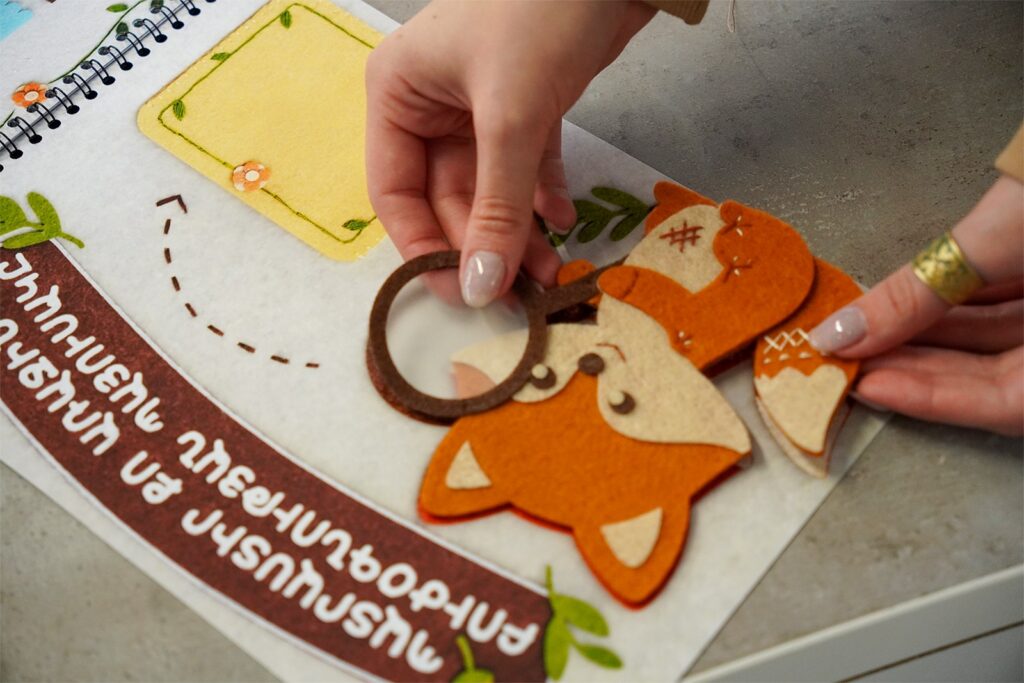
The first interactive page, featuring a removable felt fox and a personalization label
The first interactive page features a removable felt fox and an empty label where children can write their names to personalize the book. You can also customize the fox by choosing different felt colors and adding your own embroidered details.
Before assembling the page, write the child's name in the empty rectangular label. You can use a suitable marker or another writing tool that works on the material. Test it on a scrap piece first to make sure the text does not smudge.
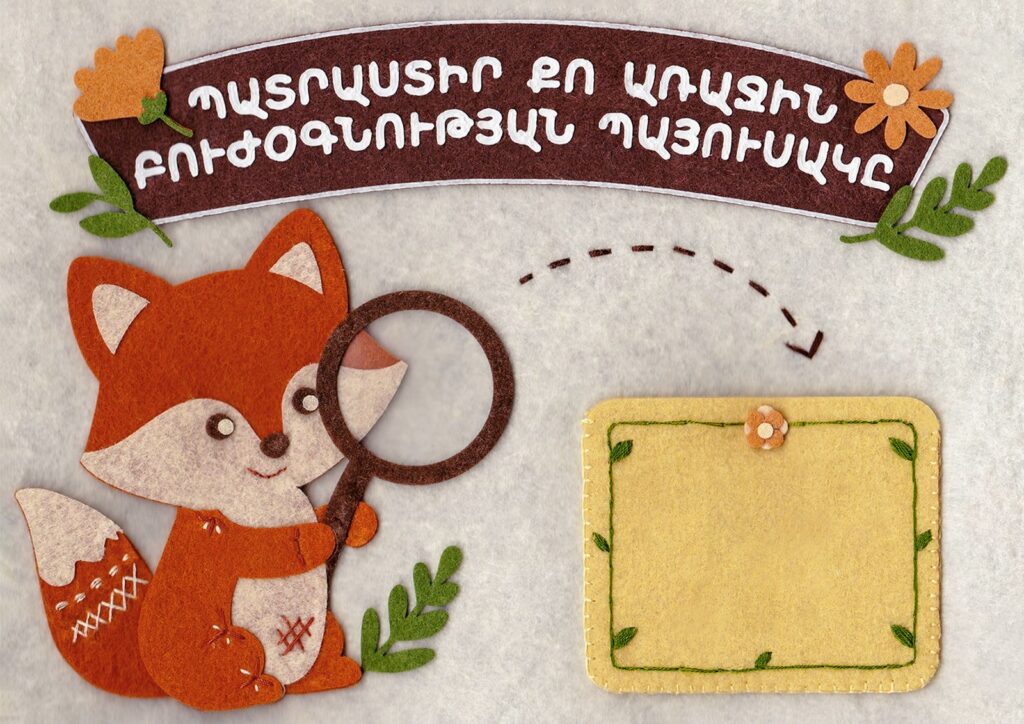
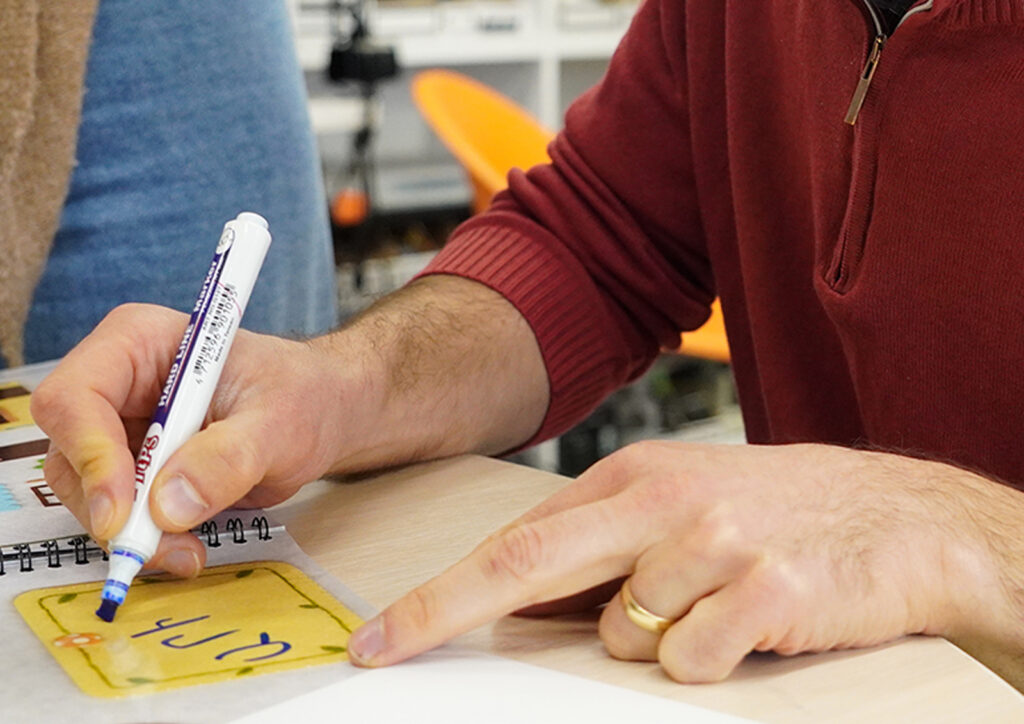
The Armenian title can be adapted or redesigned in English using Photoshop or AI tools. You can use the English title “Make Your Own First-Aid Kit” while keeping the original design and style.
The fox can be made using the provided EPS file, which contains the shapes for laser cutting. Once cut, the felt pieces are assembled with glue and can be decorated with optional embroidery.
Step 1. Prepare the Cutting File
Download the fox EPS file and open it in your vector-design or laser-cutting software. Check that the design is at the intended size and that the cutting outlines are clearly defined.
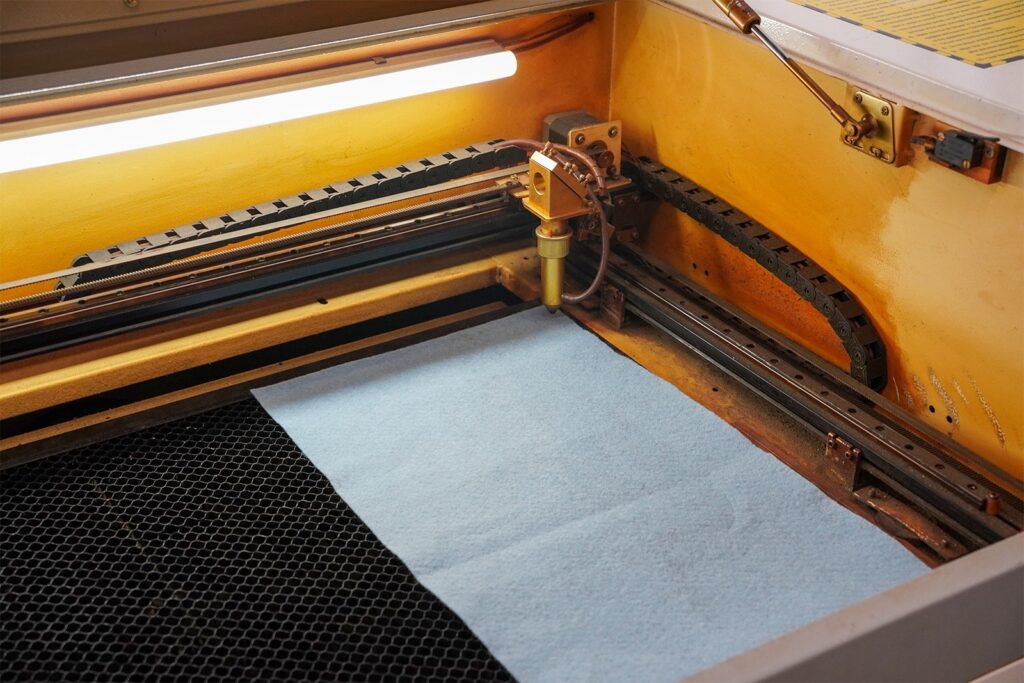
Step 2. Laser-Cut the Felt
Choose felt colors according to the design. Check that your felt composition is suitable for your laser cutter and follow the machine manufacturer's safety guidelines.
Laser settings depend on the material and the machine, so there are no universal power and speed values. Test the settings on a small piece of scrap felt first, then adjust them until the material cuts cleanly.
Use appropriate extraction and ventilation, and never leave the laser cutter unattended while it is operating.
Once the test is successful, cut the fox components and carefully remove the pieces from the cutting bed.
Step 3. Assemble the Fox
Arrange all the cut pieces on a flat surface before gluing them together.
- Use the template. Cut out the felt pieces following the fox template.
- Assemble the fox. Arrange the pieces according to the template, layering the smaller details on top of the body.
- Glue the pieces. Use fabric glue or PVA glue to attach the pieces.
- Let it dry. Allow the glue to dry completely before handling the fox.
Test the glue on a scrap piece first to check that it does not leave visible marks or change the texture of the felt.
Embroidery is not required, but it can give the fox more personality. Use a needle and embroidery thread to add a smile, facial expressions, or small decorative details. In my original version, I embroidered the smile and several small details by hand. You can follow the same approach or keep your fox simple. This step is optional, making the project accessible even to people with limited embroidery experience.
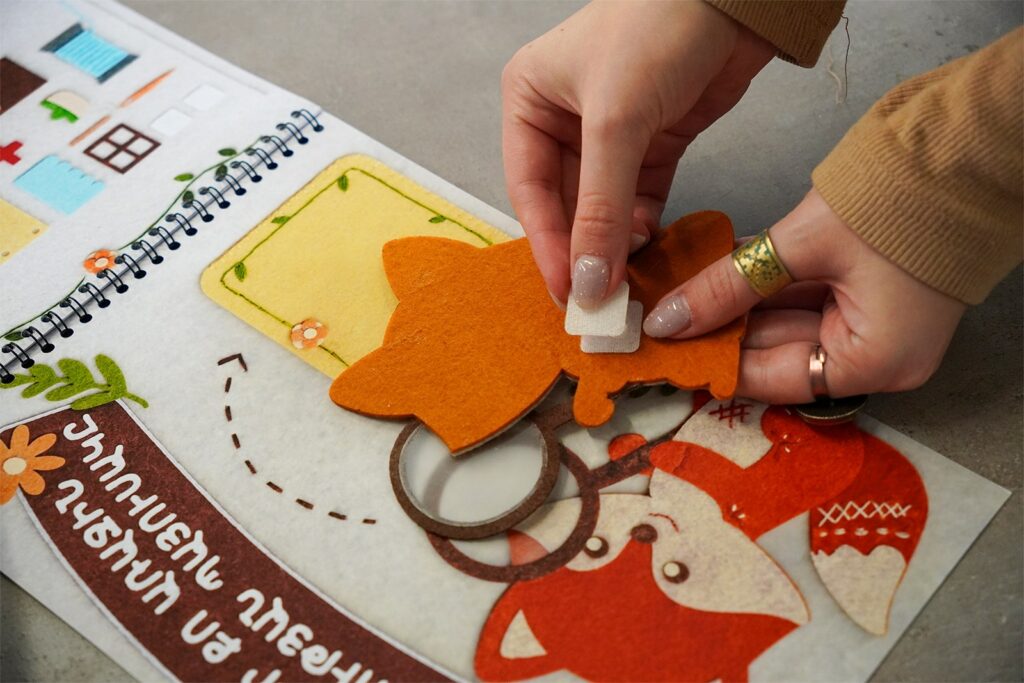
Step 4. Attach the Fox to the Book
To make the fox removable, use self-adhesive square hook-and-loop fasteners.
- Attach one side of the fastener to the back of the fox.
- Position the matching side on the designated area of the book page.
- Press the fasteners firmly into place, following the product instructions.
- Check that the fox attaches securely and can be removed and reattached easily.
Making the Interactive First-Aid Bag
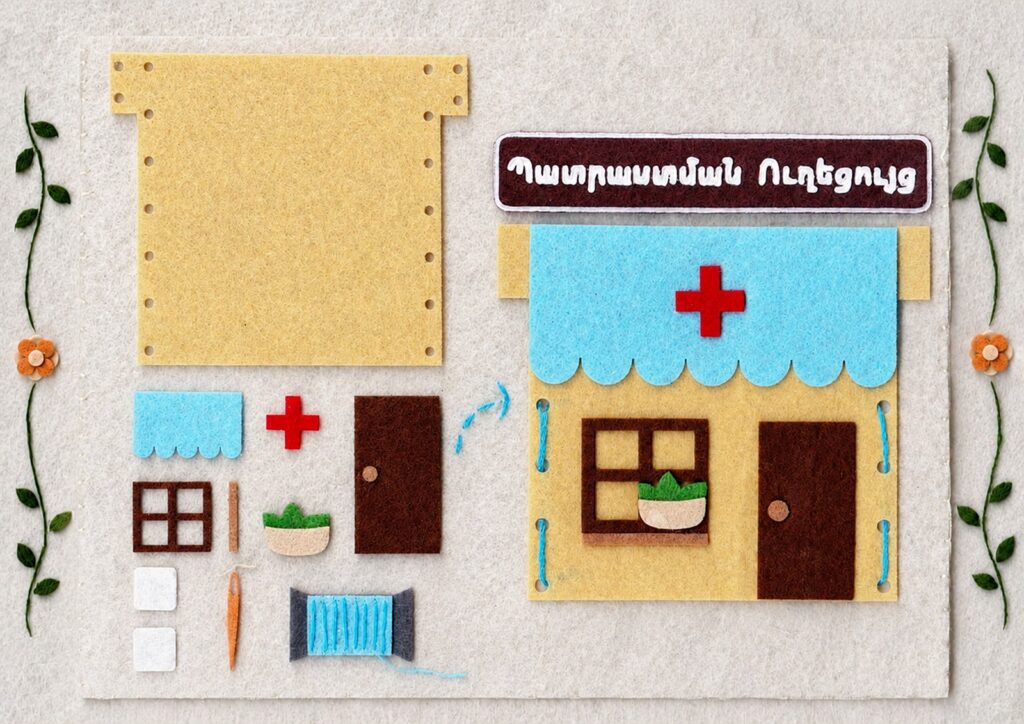
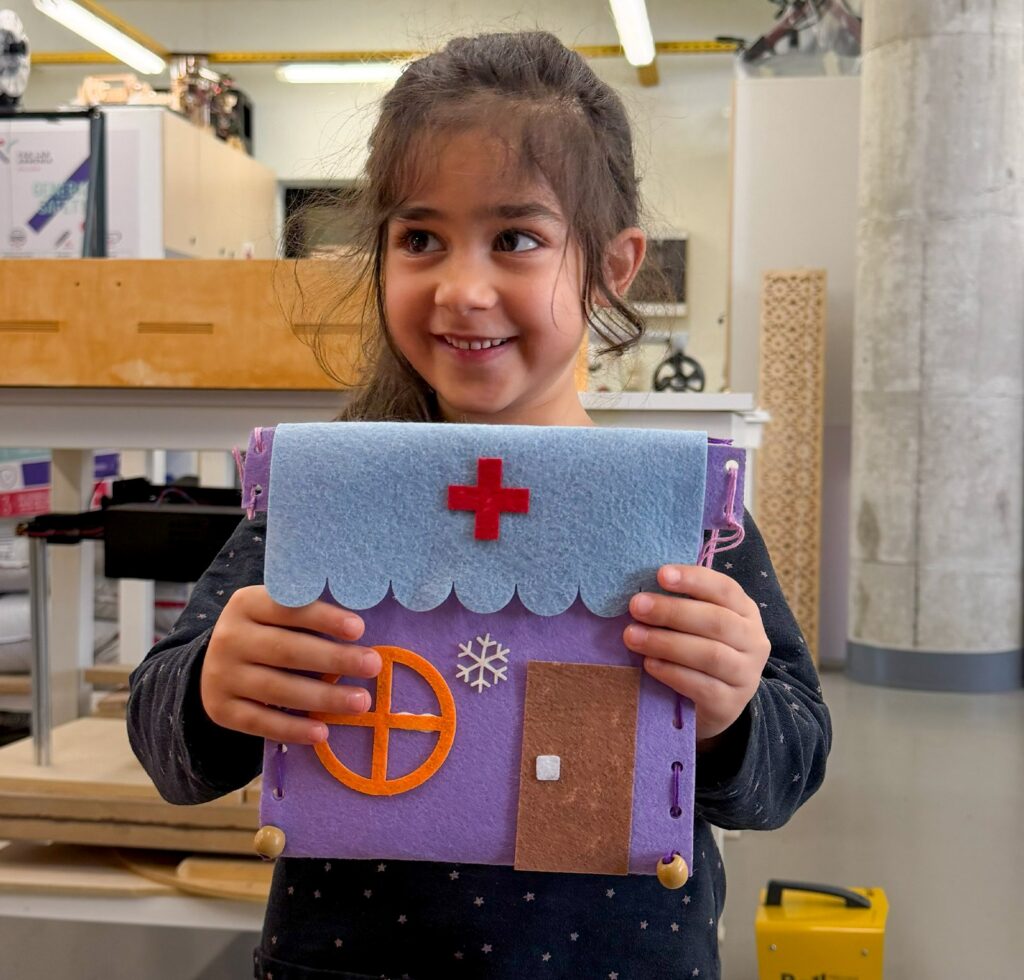
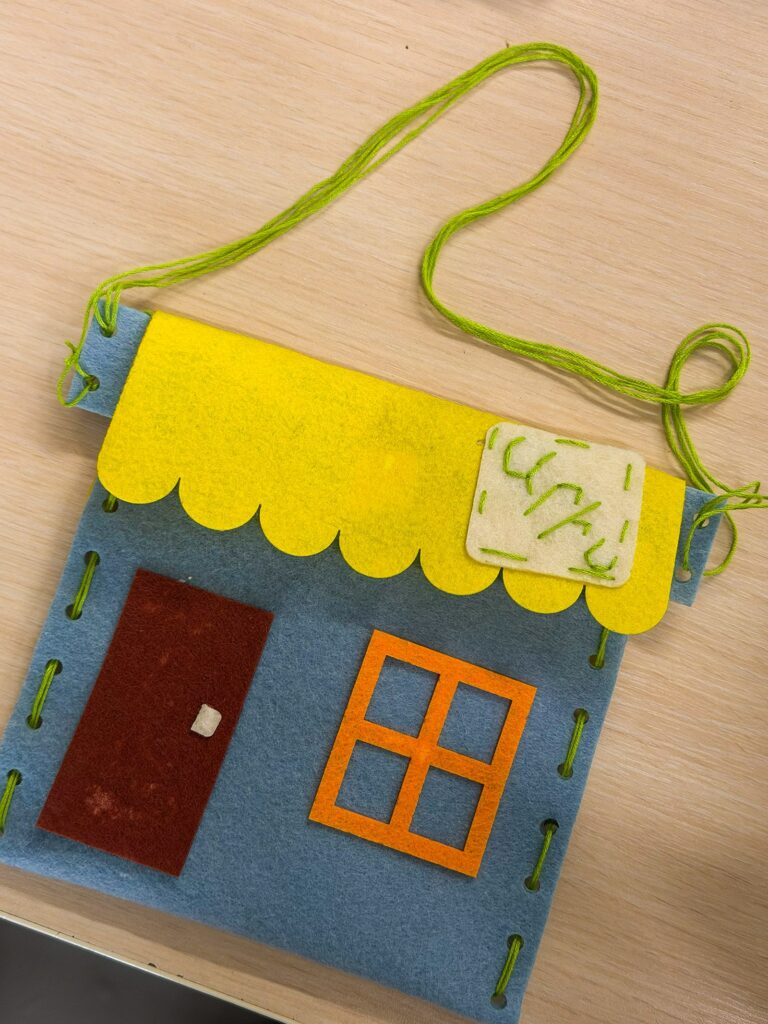
This page introduces a hands-on activity in which children create their own small first-aid bag as part of the book. The activity combines simple sewing, felt assembly, and creative decoration.
Step 1. Prepare the Bag Components (Adult Preparation)
Open the first aid bag EPS file. Check the dimensions and cutting outlines before starting. Choose your felt colors and cut the required components, including the main bag body, roof-shaped flap, window, door, red cross, and other decorative elements included in the design. Once cutting is complete, sort the pieces and prepare them for assembly.
Step 2. Prepare the Storage Pocket (Adult Preparation)
Open the bag template EPS file to laser-cut the rectangle. Cut a rectangle from felt to fit the designated area of the book page.
Position the rectangle on the page and sew along the bottom and two side edges, leaving the top open to create a pocket. Make sure the stitches are secure, and the pocket is large enough to hold the prepared materials.
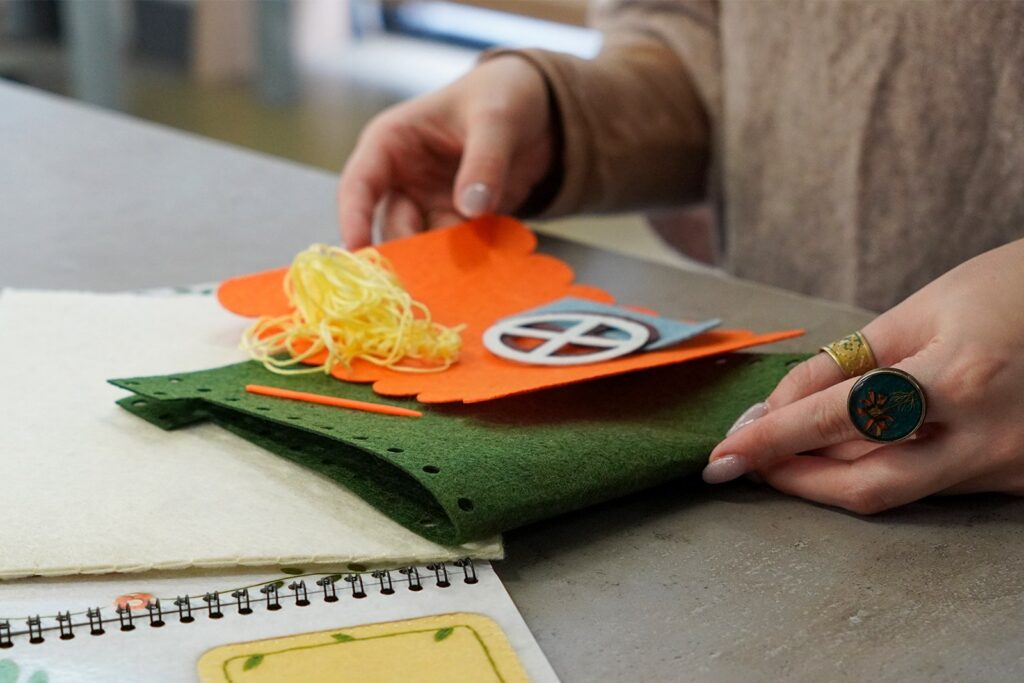
Before the workshop, place the pre-cut felt pieces, thread, and needle inside the pocket so everything is ready for the activity. Use a child-safe plastic needle designed for kids instead of a regular sewing needle.
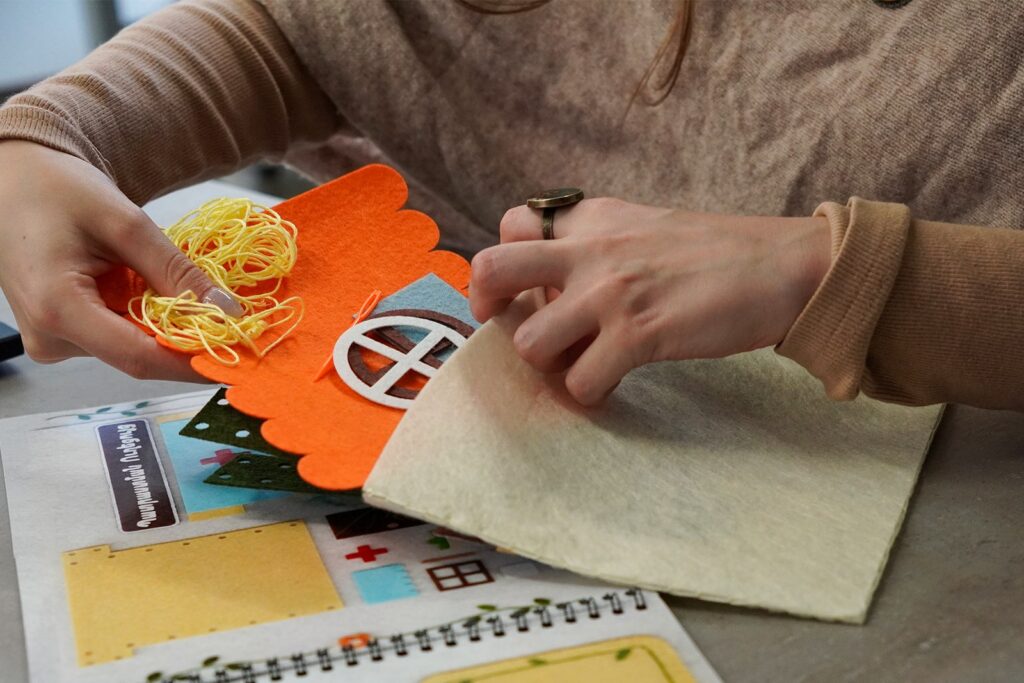
Step 3. Sew the Main Body
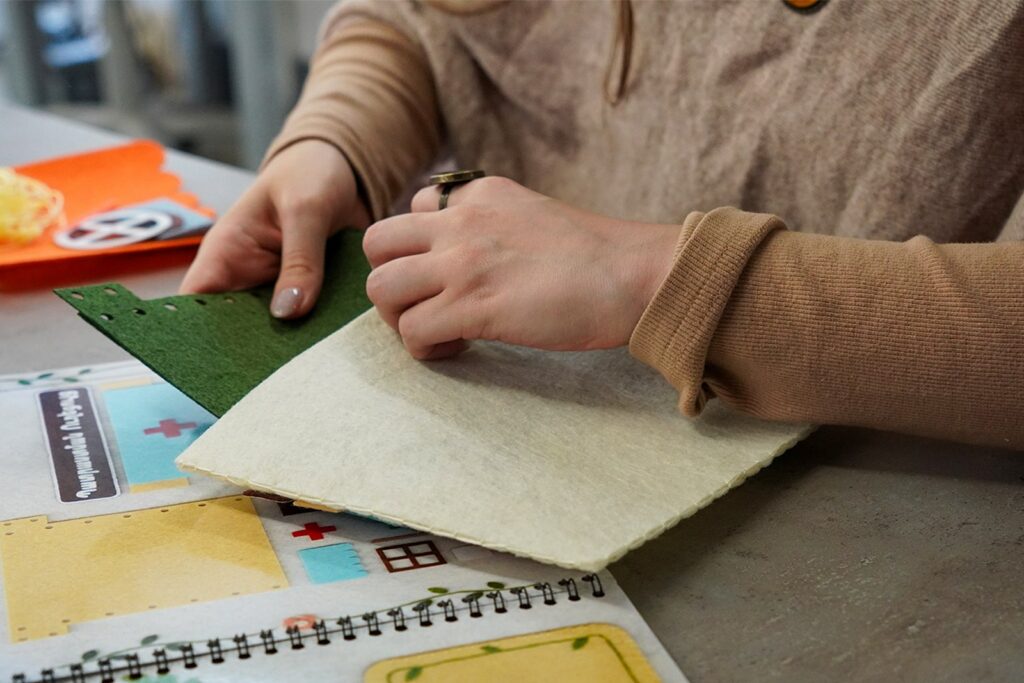
The main felt piece has pre-cut holes along its edges. These holes guide the sewing process and make it easier for beginners to assemble the bag.
- Fold the felt. Fold the main piece along the indicated lines to bring the corresponding edges together.
- Align the holes. Make sure the holes on the folded sections match.
- Sew the edges. Using a child-safe plastic sewing needle and yarn or thread, sew through the holes to join the felt pieces.
- Finish the bag. Continue sewing until the bag takes shape and the edges are securely joined.
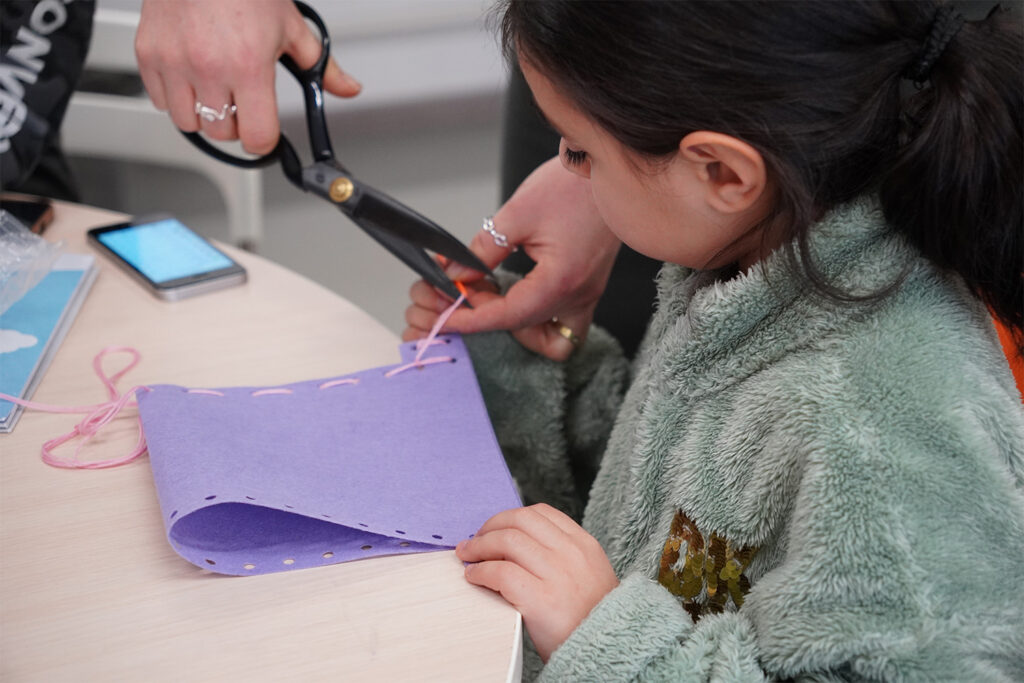
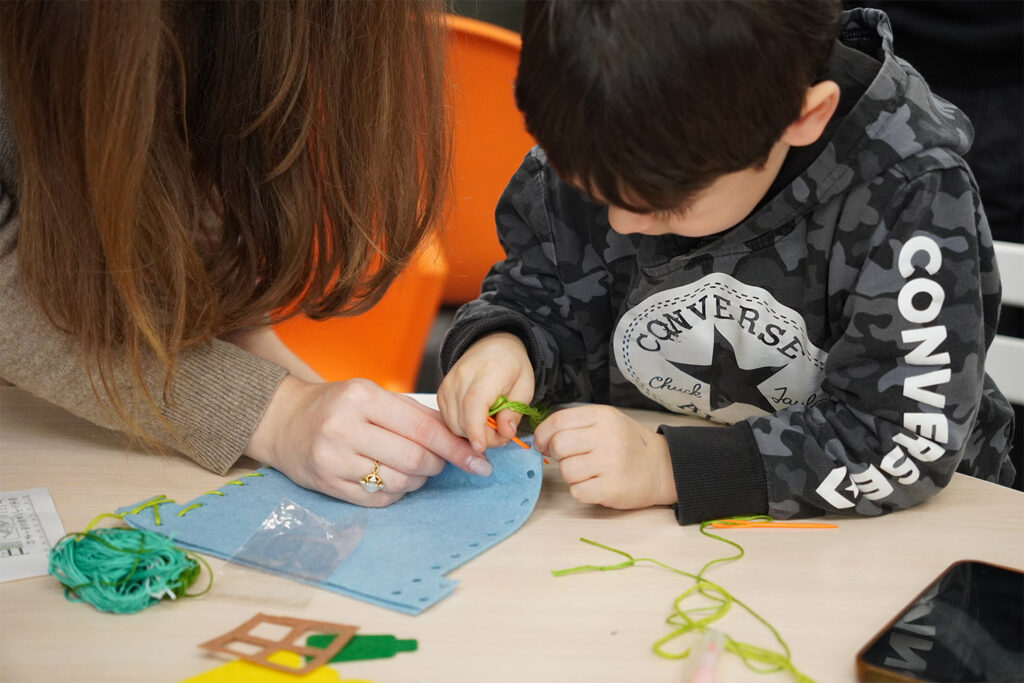
This activity gives children an opportunity to practice basic sewing skills. An adult should guide them through the process and supervise the activity.
Step 4. Attach the Roof-Shaped Piece
The roof-shaped felt piece sits at the top of the bag. It can be lifted to open the bag and lowered to close it.
Position the piece as shown in the reference image. Use self-adhesive square hook-and-loop fasteners to attach it so that it can be opened and closed easily.
Before attaching the fasteners permanently, check their placement to make sure the piece fits neatly and moves freely.
Step 5. Add the Decorative Elements
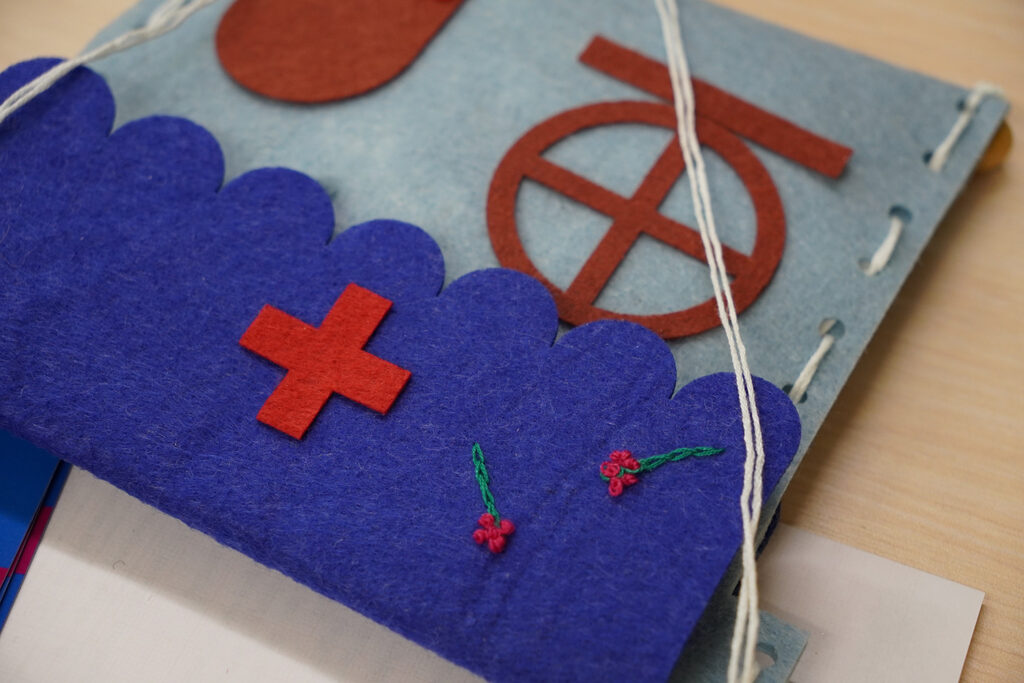
The window, door, red cross, and other decorative pieces give the bag its distinctive appearance.
Arrange the pieces according to the reference image before attaching them. Use PVA glue or fabric glue to secure them. Alternatively, use hook-and-loop fasteners if you want some elements to be removable.
The decorative elements shown in the template are optional. You can adapt the design, add embroidery, or create additional details to personalize the bag.
Step 6. Personalize and Explore
Children can decorate the bag, add their own details, or create additional felt elements.
Encourage them to participate in assembling and decorating their bags, making their own creative choices throughout the process.
Once completed, the bag becomes part of the interactive book and can be used during the educational activities.
The aim is not only to make a small bag but also to help children practice simple sewing, follow a template, work with different materials, and create their own educational object.
First Aid for Injuries
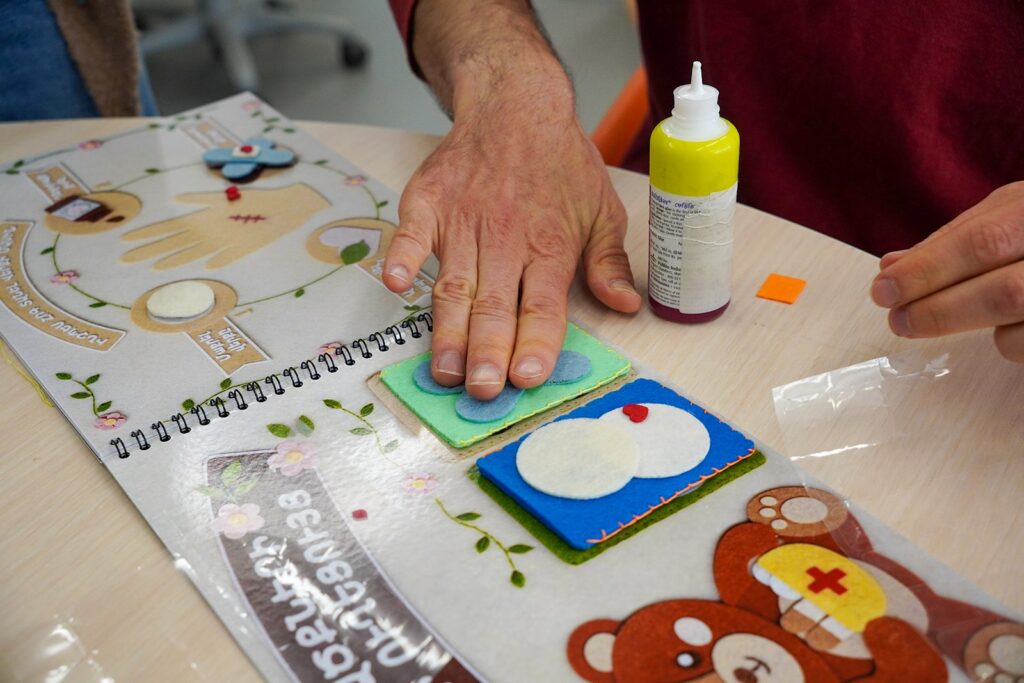
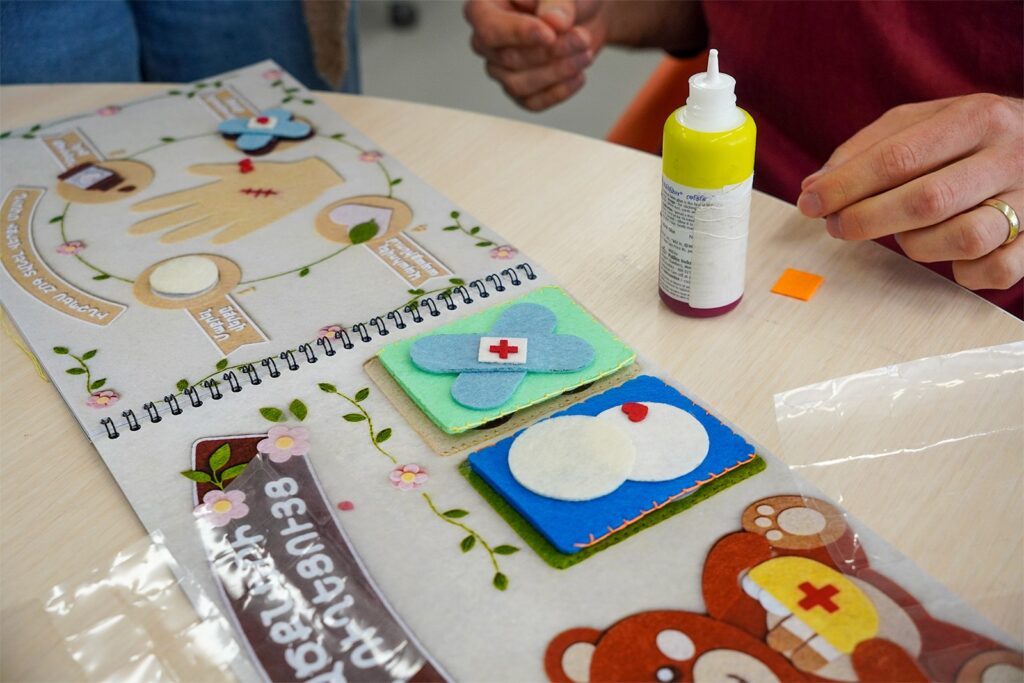
The next page focuses on first aid for injuries. It features a teddy bear holding a small first-aid kit and two felt pockets designed to store items used in the educational activities.
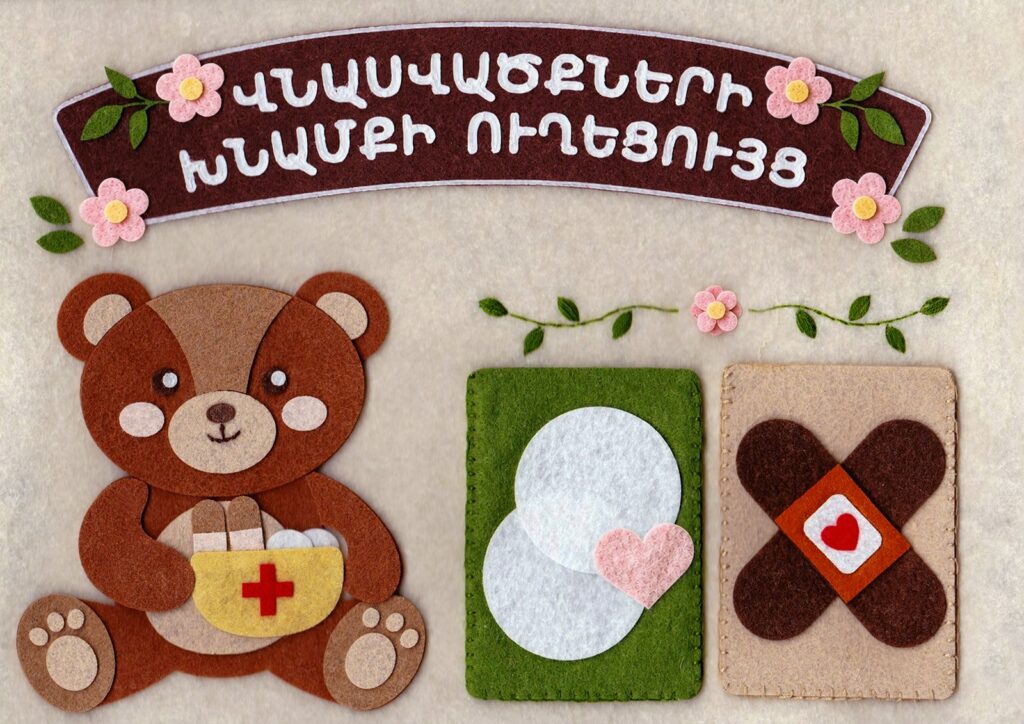
The original page title is in Armenian: Վնասվածքների խնամքի ուղեցույց, which translates to First Aid for Injuries. As with the previous pages, you can adapt the title using Adobe Photoshop or another image-editing tool if you want to create a version in a different language.
This page combines a decorative felt character with practical storage elements. The teddy bear is assembled from laser-cut felt pieces, while the two pockets are sewn separately and attached to the page using reusable hook-and-loop fasteners.
Step 1. Prepare the Teddy Bear Cutting File
Open the Bear EPS file. Before cutting, check that no outlines overlap. Choose felt colors for the different parts and arrange the pieces so that each component can be identified easily during assembly.
Step 2. Laser-Cut the Teddy Bear
Prepare the felt sheets and check that the material is suitable for your laser cutter. Test the settings on a small piece of scrap felt before cutting the complete design.
After cutting, carefully remove the pieces and sort them by color and function. Keep the small decorative components together so they are easy to find during assembly.
Step 3. Assemble the Teddy Bear
Arrange the felt pieces on a flat surface and use the reference image to guide the assembly.
- Create the main shape. Position the body and head pieces, aligning them according to the design.
- Assemble the face. Add the contrasting felt shapes for the muzzle, cheeks, ears, and other facial details.
- Attach the arms and legs. Position the paws and limbs to give the teddy bear its seated appearance.
- Add the small details. Attach the remaining shapes, including the details on the paws and the first-aid kit.
- Glue the pieces together. Apply a thin layer of PVA glue or fabric glue to the areas that need to be joined. Avoid using too much glue, which can soak through the felt or make it stiff.
- Allow the glue to dry. Follow the adhesive manufacturer's instructions before handling the finished character. You can add small embroidered details to give the teddy bear more expression and character. Use embroidery thread to create facial details or decorative stitches where appropriate.
Step 4. Prepare the Two Felt Pockets (Adult Preparation)
The page includes two separate pockets, each decorated with an illustration indicating its intended use. The pockets are removable, allowing the contents to be stored, taken out, and returned during activities.
The pockets should be prepared by an adult before the workshop.
Open the first aid pockets: cotton pads, adhesive plasters EPS file. Cut the required felt pieces using the same preparation and laser-cutting procedures described earlier.
For each pocket:
- Arrange the cut pieces. Place the front and back pieces together according to the template.
- Sew the pocket. Join the pieces along the bottom and side edges, leaving the top open so the pocket can hold its contents. Follow the design provided in the cutting file.
- Check the finished pocket. Make sure the seams are secure and that the opening is wide enough to insert and remove the intended items.
- Add the decorative details. Attach the illustrated elements to the front of each pocket using embroidery, glue, or the method indicated by the design.
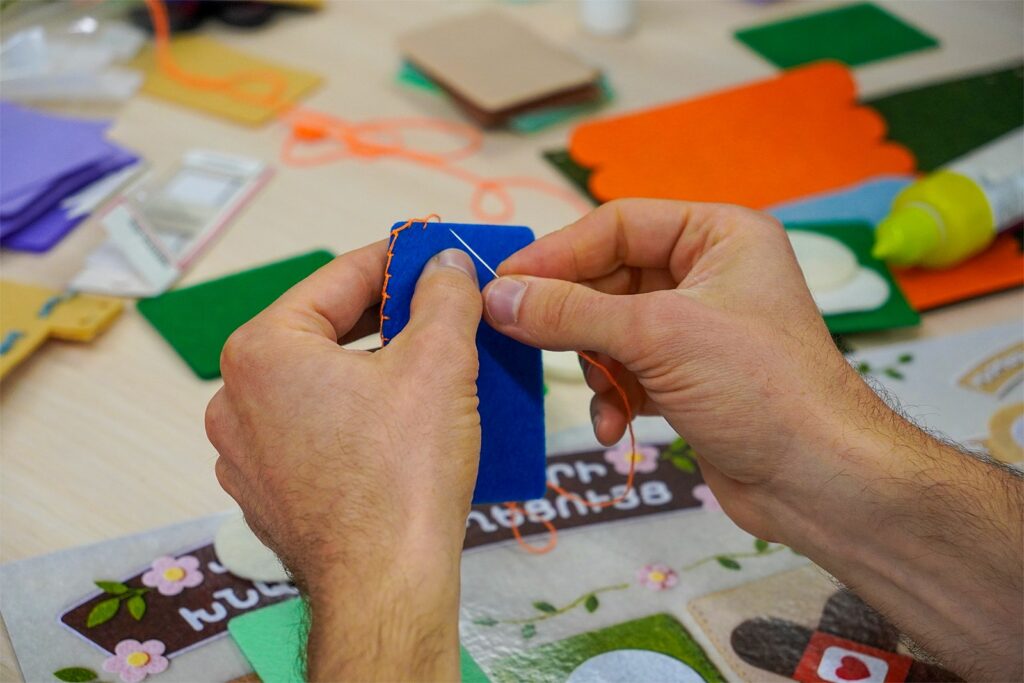
The illustrations on the pockets can be used as visual guides to help children identify where the corresponding items belong. You can adapt the decorations or add extra details to suit your workshop.
Step 5. Attach the Pockets to the Page
Use self-adhesive square hook-and-loop fasteners to attach the two pockets to the felt page.
- Decide where each pocket should be positioned, using the reference image as a guide.
- Attach one side of the fastener to the back of each pocket.
- Attach the matching side to the corresponding area of the book page.
- Press the fasteners firmly into place, following the product instructions.
- Check that both pockets can be removed and reattached easily and remain secure during handling.
The fastening system makes the pockets reusable and allows children to access their contents without permanently attaching the pockets to the page.
Step 6. Add the First-Aid Items
Once the pockets are assembled and attached, you can place the corresponding first-aid items inside them according to the illustrations and the intended activity.
This creates a practical storage area for the materials used throughout the book. Children can take out the items, explore them with adult guidance, and return them to the appropriate pocket when the activity is finished.
How to Care for a Wound
The title of the original Armenian page, Ինչպես հոգ տանել վերքի մասին, translates to How to Care for a Wound.
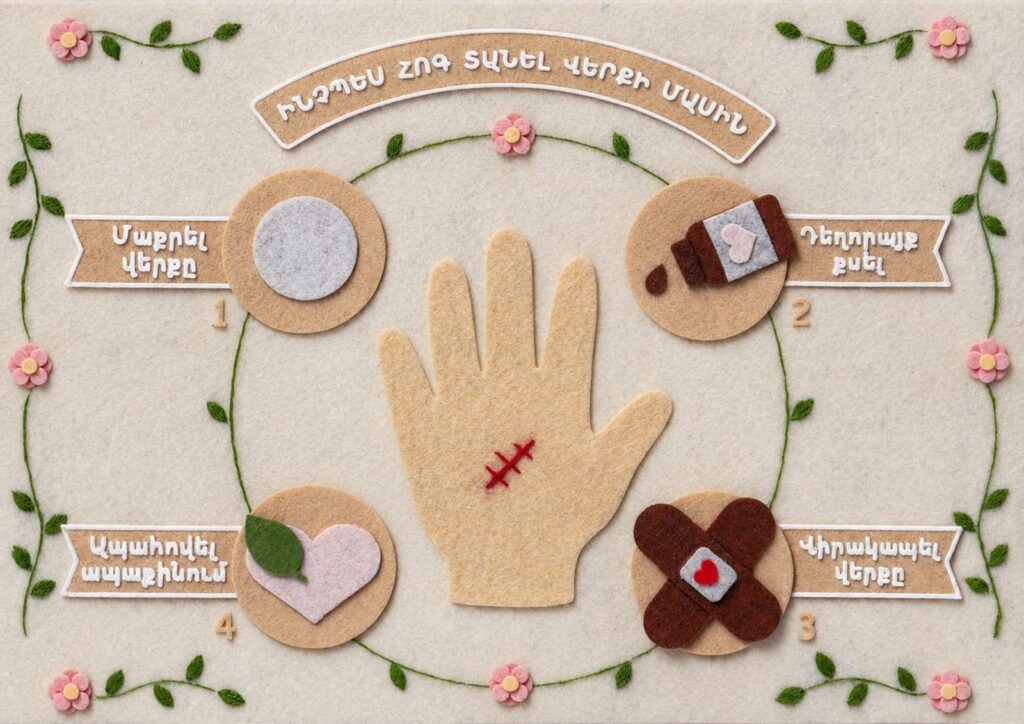
The page introduces children to a simple sequence of first-aid actions through illustrated instructions and removable felt elements. The four steps shown on the page are:
- Clean the wound — Մաքրել վերքը
- Apply medicine to the wound — Դեղորայք քսել
- Bandage the wound — Վիրակապել վերքը
- Ensure Proper Healing — Ապահովել ապաքինում
As with the previous pages, you can adapt the Armenian title and instructions using Adobe Photoshop or other image-editing tools to create a version in your preferred language.
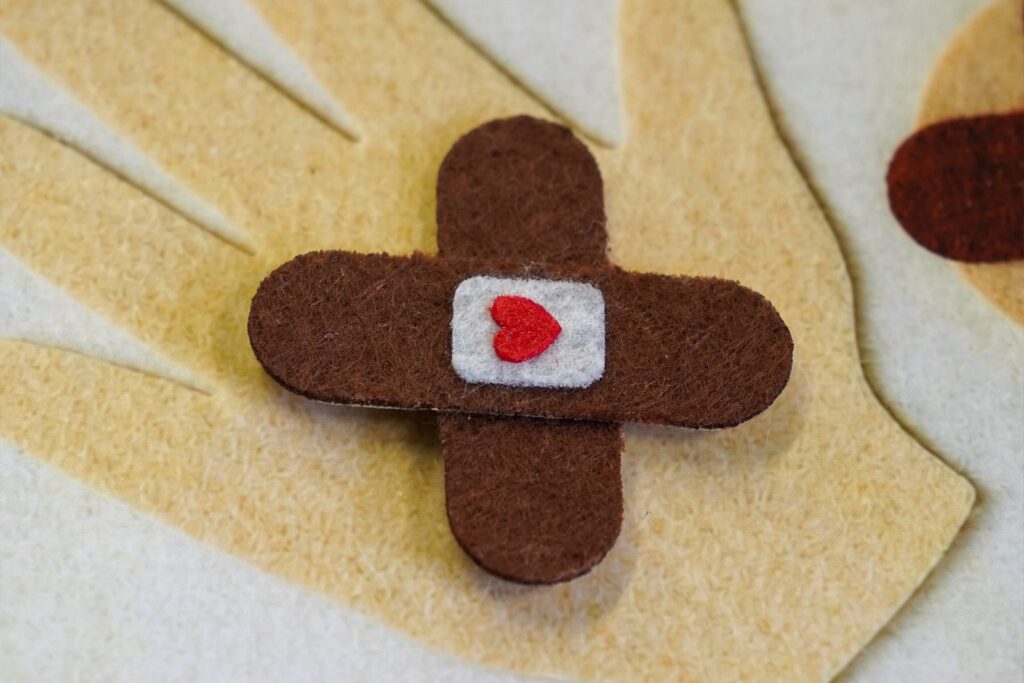
The three main removable elements are a cotton pad, a medicine prop, and an adhesive plaster. These let children interact with the illustrated instructions and practise the action sequence.
Step 1. Prepare the Cutting Files
Open the first aid elements EPS file. Check the dimensions and cutting outlines, and make sure the separate shapes are easy to identify before cutting. Choose felt colors that match the reference image or adapt the palette to your preferences.
Step 2. Assemble the Removable Elements
Use the reference photograph as a guide when assembling each object.
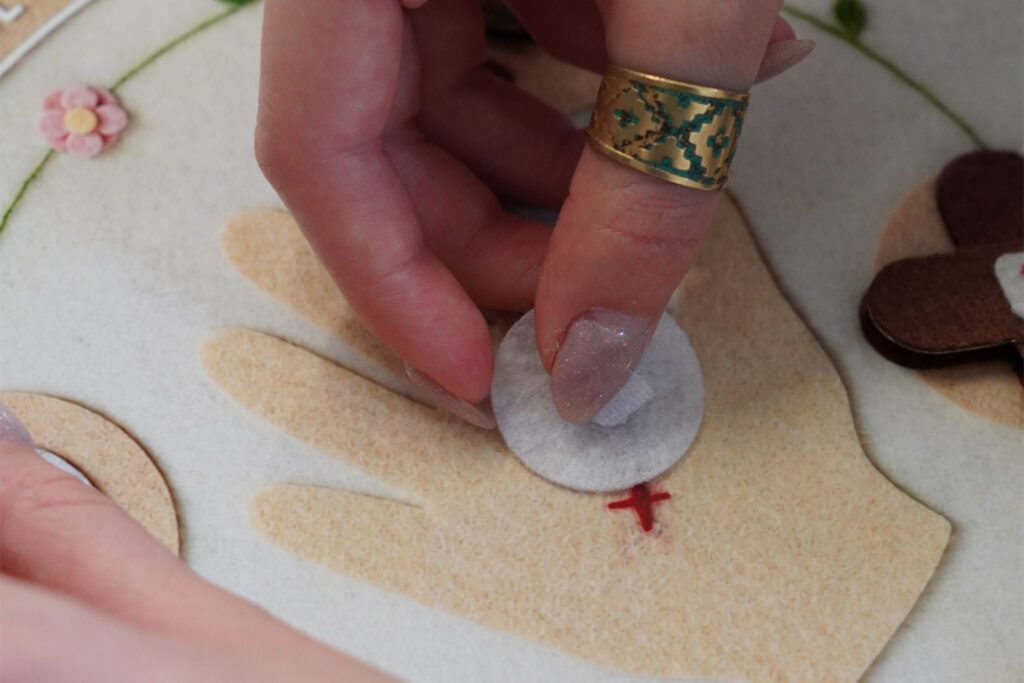
Cotton pad: Assemble the felt shapes provided in the cutting file to create the round cotton pad illustration.
Medicine container: Arrange and glue the felt components to create the small medicine prop. Follow the supplied template to position the different parts correctly.
Adhesive plaster: Assemble the felt shapes that form the plaster, including the contrasting central detail.
Apply a small amount of PVA glue or fabric glue where the layers need to be joined.
Step 3. Attach the Elements to the Page
Use self-adhesive square hook-and-loop fasteners to make the three elements removable.
- Attach one side of the fastener to the back of each finished felt element.
- Place the corresponding fastener on the designated area of the book page.
- Press the fasteners firmly into place, following the product instructions.
- Check that each element attaches securely but can still be removed and reattached easily.
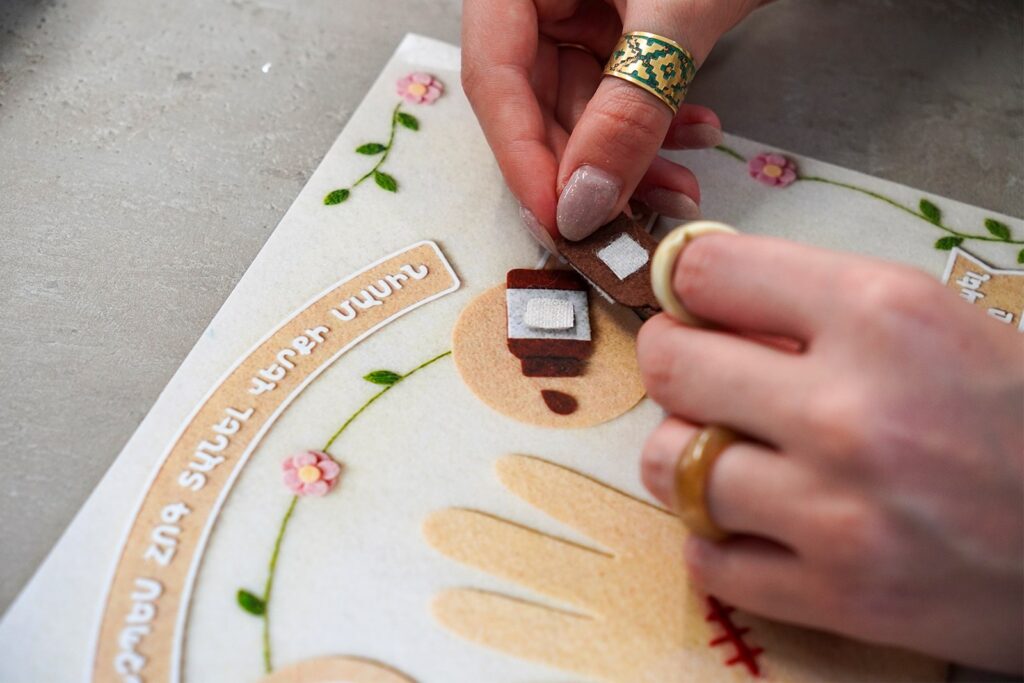
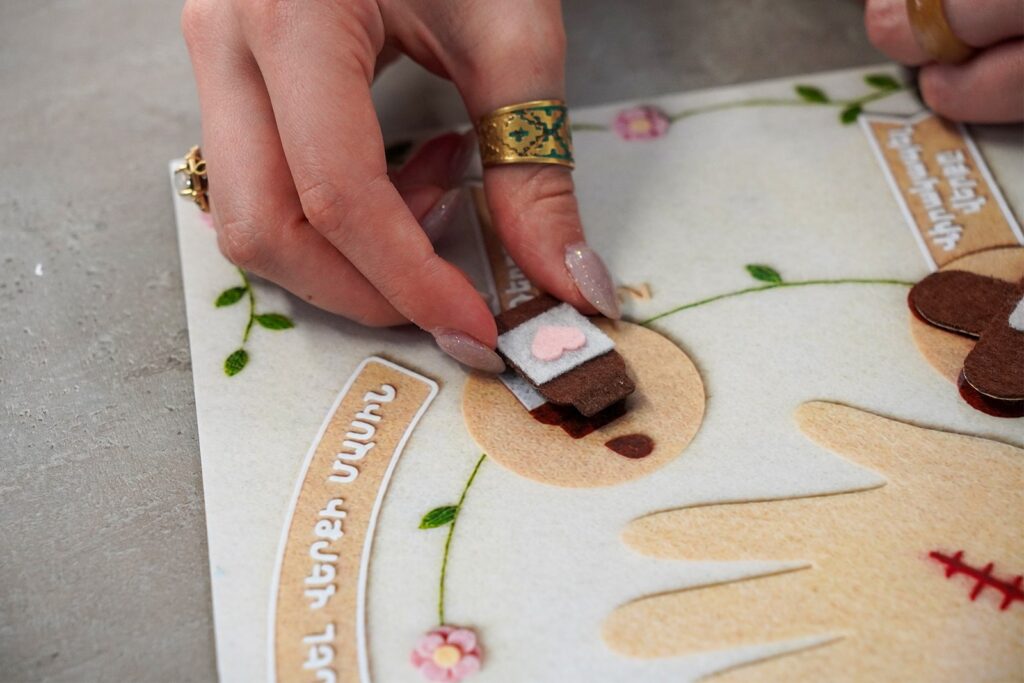
This fastening system allows children to move the elements between activities without permanently attaching them to the page.
Step 4. Explore the First-Aid Sequence
Once the elements are ready, children can use them to follow the illustrated instructions.
Begin with the cotton pad and discuss cleaning a wound. Next, introduce the medicine prop, followed by the dressing and adhesive-plaster steps shown on the page. Children can pick up the corresponding elements as they move through the sequence.
Encourage them to identify each object, match it to the relevant illustration, and explain what happens at each stage. This turns the page into a hands-on learning activity rather than a static illustration.
Treating Bruises and Swelling
The original Armenian title, Կապտուկ և ուռածություն, translates to Bruises and Swelling.
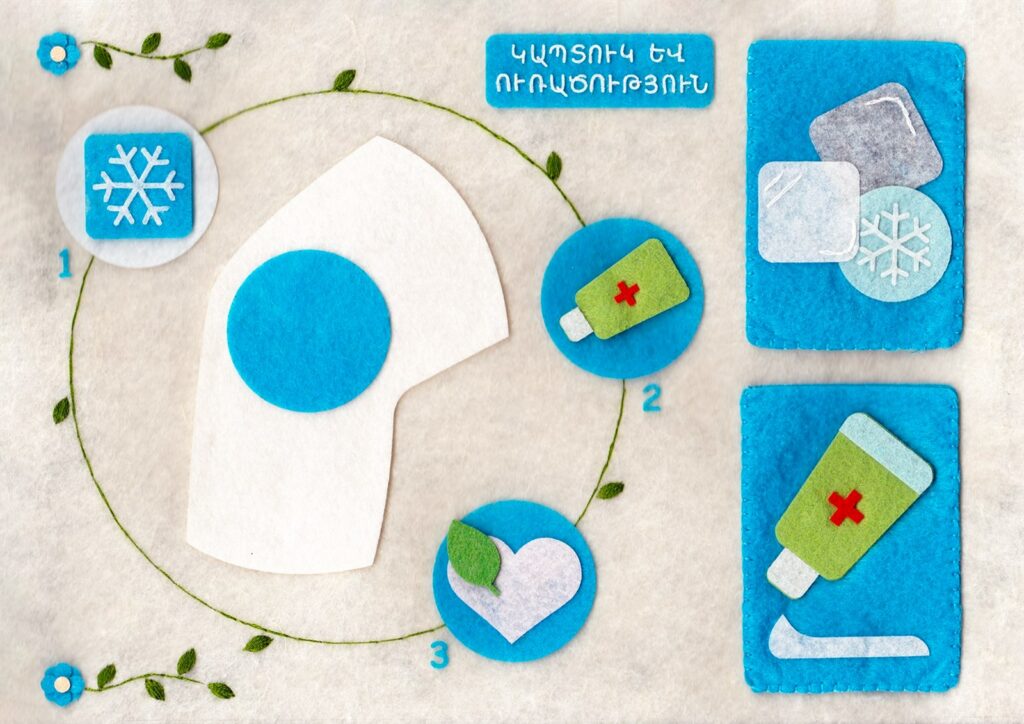
As with the previous pages, you can adapt the title and instructions to your preferred language using Adobe Photoshop or other image-editing tools. Make sure the translated text fits the layout and that the first-aid information is accurate before printing.
This page introduces children to first-aid items that may be used when learning about bruises and swelling. It includes two interactive steps with removable felt elements and two pockets for storing the corresponding items.
Step 1. Prepare the Interactive Elements
Open the first aid for bruises and swelling EPS file. Choose your felt colors according to the reference image, then cut the required pieces using a laser cutter suitable for your material. Test the settings on a scrap piece of felt first and follow the machine manufacturer's safety instructions.
Once the pieces are cut, arrange them according to the reference image.
Apply a small amount of PVA glue or fabric glue to join the layers and create the finished shapes. Allow the glue to dry fully before handling the elements.
Step 2. Attach the Removable Elements
The first two steps on this page are designed to be interactive. Children can remove the corresponding felt elements, explore the items associated with each step, and return the elements to their original positions.
Use self-adhesive square hook-and-loop fasteners to attach the elements to the page.
- Attach one side of the fastener to the back of each finished felt element.
- Place the matching side on the corresponding position on the page.
- Press the fasteners firmly into place, following the product instructions.
- Check that the elements can be removed and reattached easily while remaining secure during handling.
This system makes the page reusable and allows children to participate actively in the learning activity.
Step 3. Prepare the Pockets (Adult Preparation)
The page includes two blue felt pockets for storing the items associated with the first two steps. An adult should prepare these pockets in advance.
Cut the required felt pieces using the provided templates, if available, and sew the pocket components together, leaving the top open. Attach the finished pockets to the designated areas of the book page using self-adhesive square hook-and-loop fasteners.
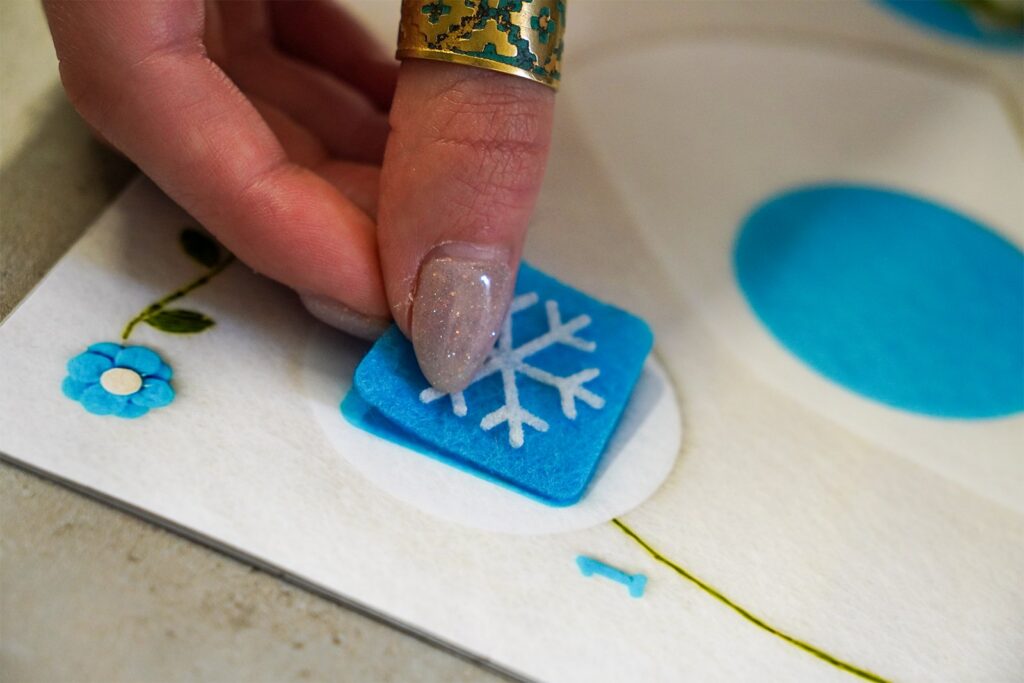
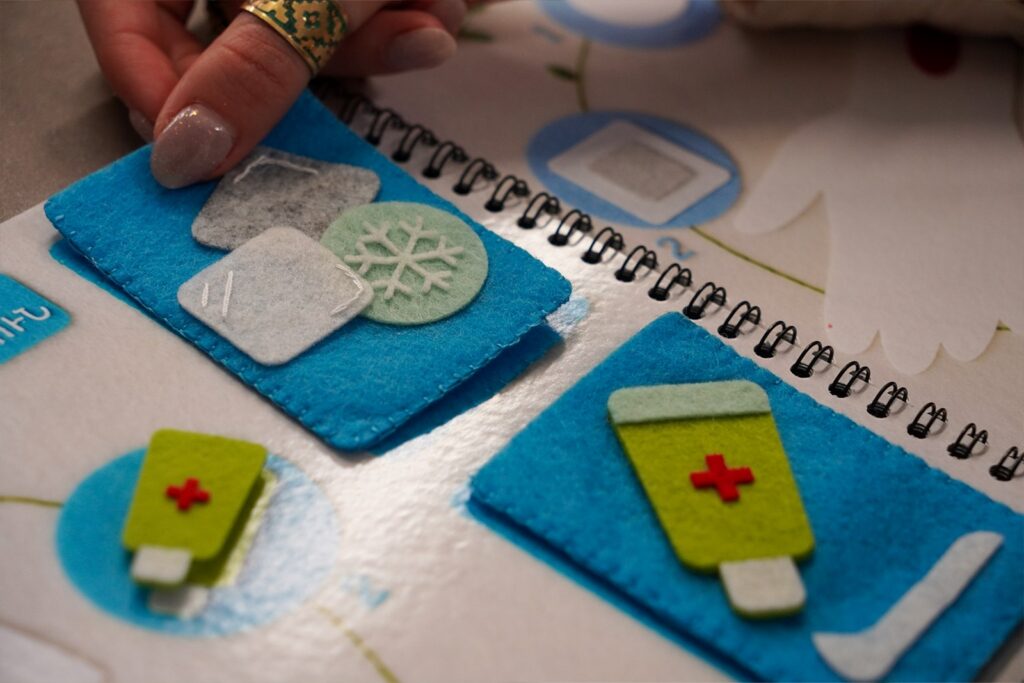
Pocket 1: Cold Compress
The first pocket is intended to hold an item used to demonstrate a cold compress.
You can prepare a securely sealed plastic bag containing water and freeze it before the activity, or use a suitable reusable cold pack. Place the item inside the pocket when it is not in use.
For children's activities, a commercially manufactured cold pack used according to its instructions may be the more practical option. Check the bag or pack for leaks and use an appropriate protective barrier. Cold items should not be placed directly against the skin for prolonged periods.
Pocket 2: Ointment
The second pocket is intended to hold a small tube of Heparin ointment, as shown in the original design.
Place the tube inside the pocket and remove it only when demonstrating the relevant educational step.
Safety note: Heparin ointment is a medication, not a toy. Keep it inaccessible to children and do not allow them to apply it themselves. For workshops with children, consider using an empty, clearly labelled demonstration tube instead. Any real medication should be used only in accordance with its instructions and appropriate medical advice.
Step 4. Explore the Interactive Page
Once the pockets and removable elements are ready, introduce the page to the children.
Begin by discussing the illustrations and explaining the purpose of the items. Children can remove the felt elements, match them to the corresponding steps, and return them to their positions.
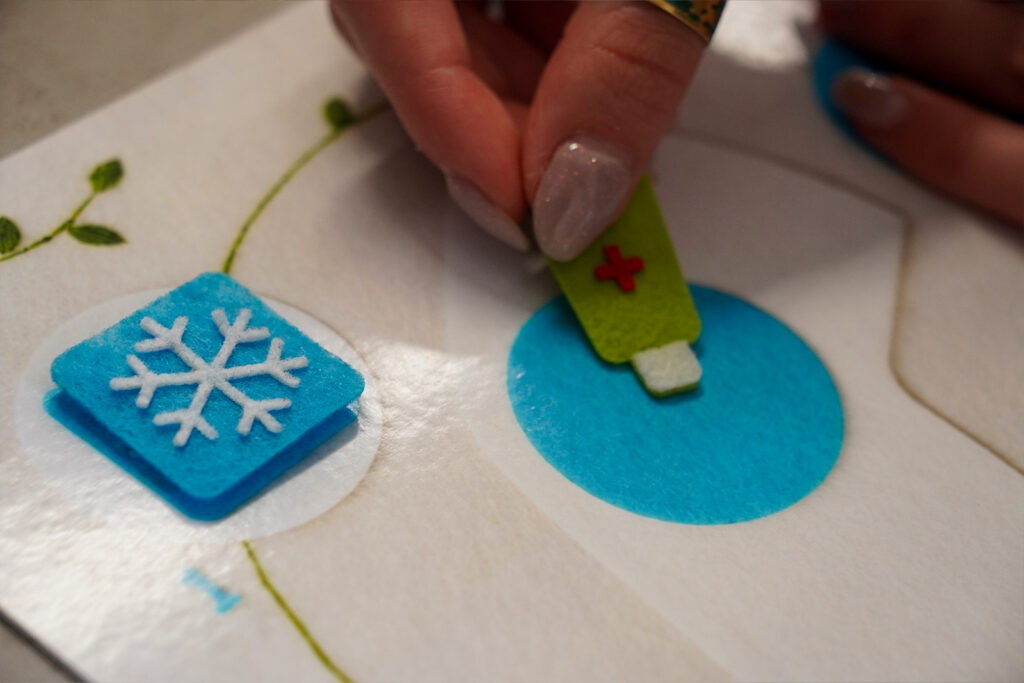
The pockets provide a convenient place to store the demonstration items between activities, while the removable elements help children connect each illustrated step with the object it represents.
Encourage children to describe what they see and ask questions about the illustrated situations. Keep all practical demonstrations age-appropriate and ensure that first-aid instructions are checked against reliable guidance.
The aim of this page is to make learning about bruises and swelling more engaging through visual association, hands-on interaction, and guided discussion.
Caring for Larger Wounds: Interactive Arm and Bandaging Activity
The original Armenian title, Միջին և մեծ վերքեր, translates to Medium and Large Wounds.
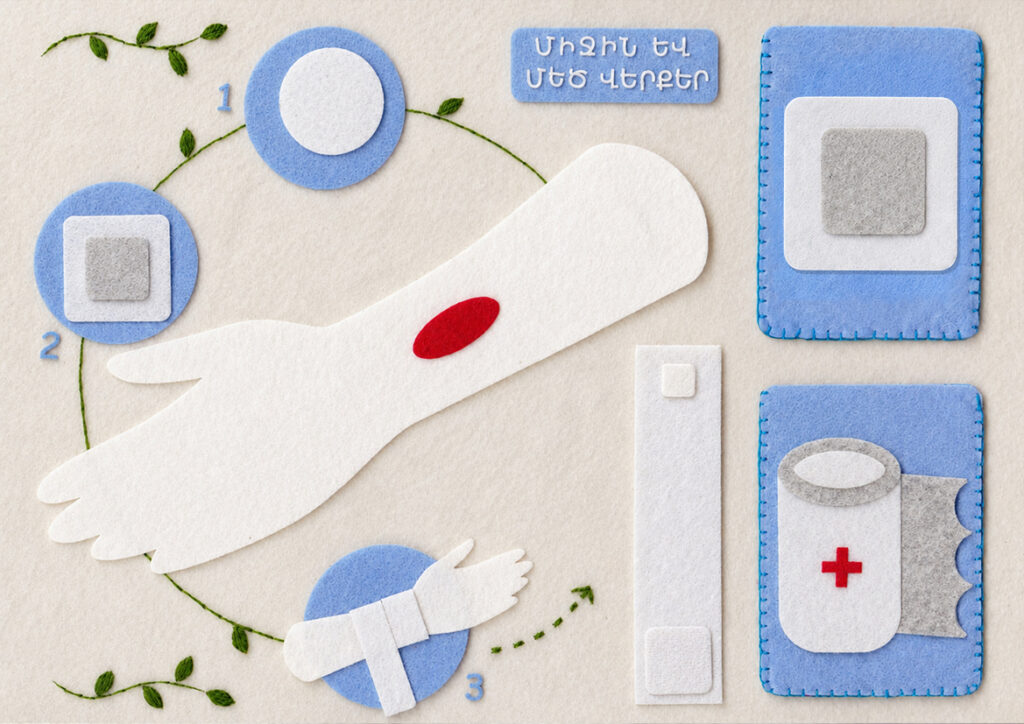
As with the previous pages, you can adapt the title and instructions using Adobe Photoshop or other image-editing tools to create a version in your preferred language. Check the translated text and layout before printing.
This page introduces children to the basic steps involved in covering a wound. It includes a large felt arm with a simulated wound, two removable illustrated elements, and two pockets for storing the materials used in the activity.
The main interactive element is the large white arm, which can be cut separately from the supplied felt template. Children can handle the arm and practise positioning a dressing or bandage on it. This makes the activity more hands-on and helps them understand how the different materials are used.
Step 1. Prepare the Cutting Files
Open the first aid for medium and large wounds EPS file.
Check the dimensions and make sure the cutting outlines are clearly defined. Choose felt colors according to the reference image and organize the components before cutting.
Step 2. Laser-Cut the Felt
Prepare the felt sheets and check that the material is suitable for your laser cutter. Test the settings on a scrap piece before cutting the complete designs.
Follow the machine manufacturer's instructions for material compatibility, ventilation, and fire safety.
Step 3. Assemble the Arm and Interactive Elements
Arrange the cut pieces using the reference image as a guide.
- Assemble the illustrated elements. Glue the corresponding felt layers together to recreate the two removable elements shown in the numbered illustrations.
- Secure the layers. Apply a small amount of PVA glue or fabric glue where the pieces need to be joined.
- Allow the glue to dry. Follow the adhesive manufacturer's instructions before handling the finished pieces.
The red mark represents a simulated wound for the educational activity. It should not be used to demonstrate anything on an actual injury.
Step 4. Make the Elements Removable
The two illustrated elements and the large arm are designed to be interactive.
Use self-adhesive square hook-and-loop fasteners to connect the removable parts to the book page.
- Attach one side of the fastener to the back of each element.
- Place the matching side on the designated area of the page.
- Position the arm so it can be removed and returned to its place easily.
- Press the fasteners firmly into place according to the product instructions.
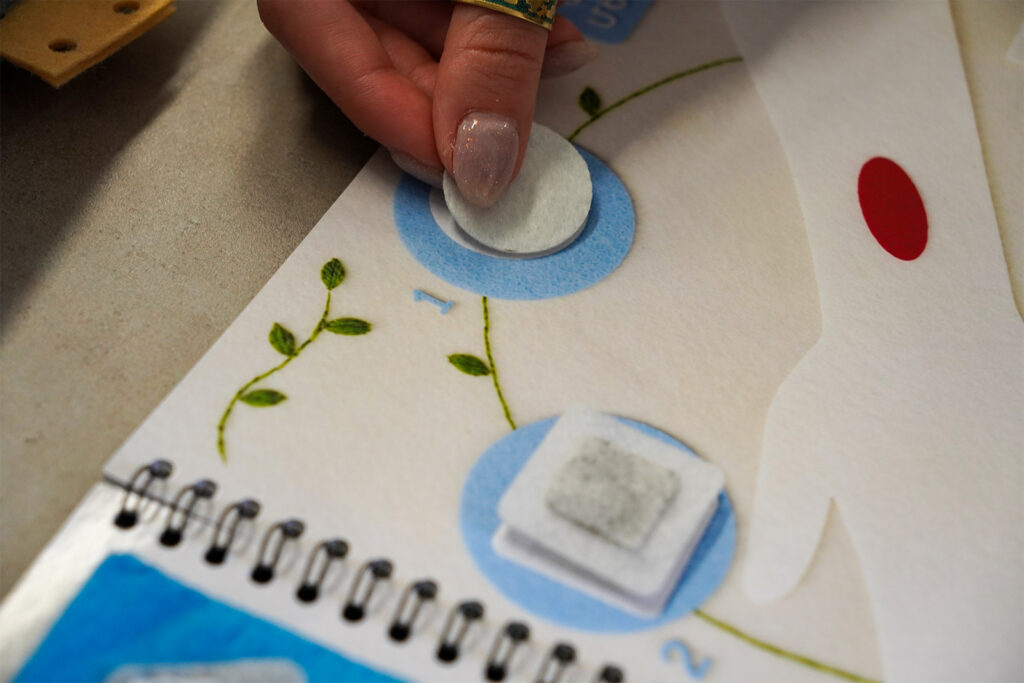
The removable arm can then be used as a separate surface for practising how to position a dressing or wrap a bandage.
Step 5. Prepare the Two Pockets (Adult Preparation)
The page includes two blue felt pockets for storing the dressing materials used in the activity. An adult should prepare these pockets before the workshop.
Download the pocket templates and laser-cut the required felt pieces. Assemble each pocket by sewing the relevant edges, leaving the top open so the contents can be inserted and removed.
Use the reference image to position the decorative components on the front of each pocket. Attach the finished pockets to the book page with self-adhesive square hook-and-loop fasteners, allowing them to be removed when needed.
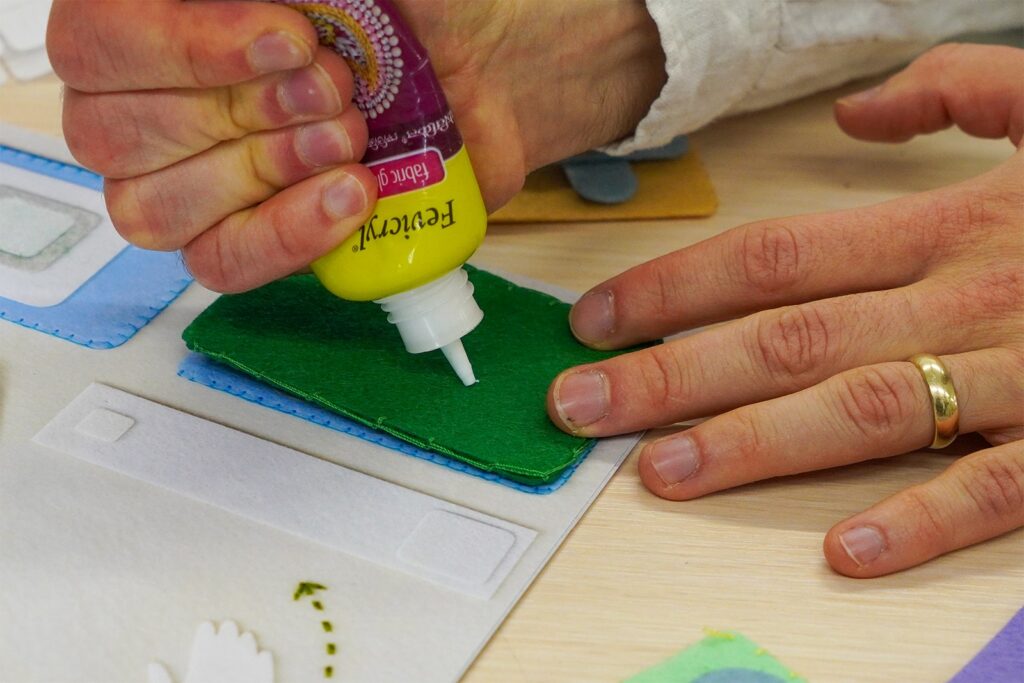
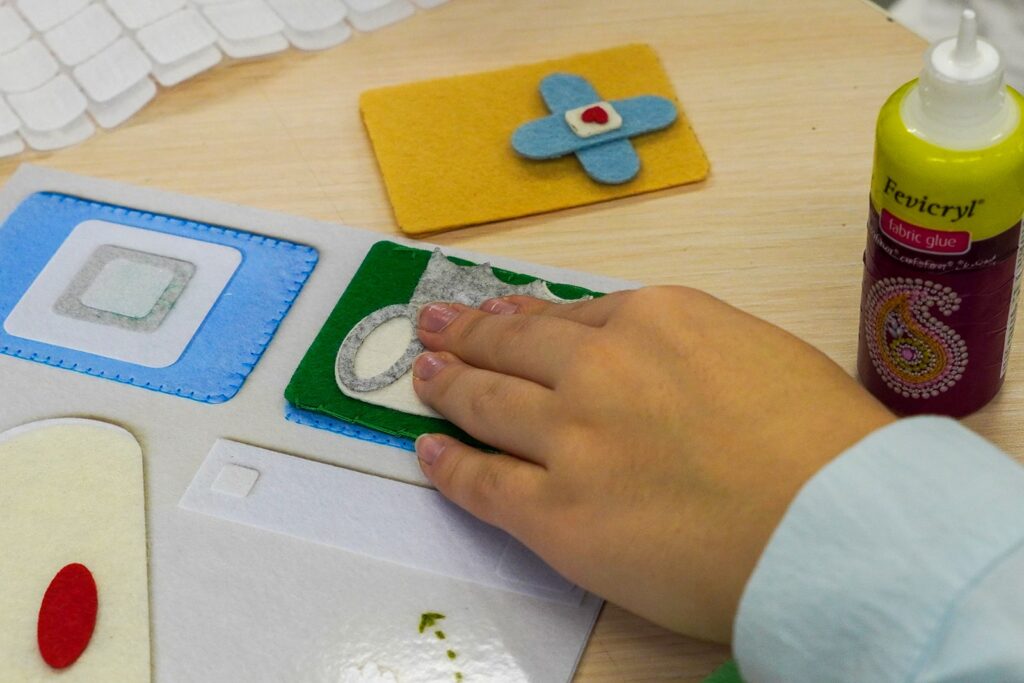
Pocket 1: Dressing Material
Use the first pocket to store a suitable gauze pad or educational dressing material. Children can take it out during the activity and practise positioning it over the simulated wound on the felt arm.
Pocket 2: Bandage
Use the second pocket to store a roll of bandage. This can be used to demonstrate how a dressing is held in place on the felt arm.
Keep the contents organized and return them to their pockets after the activity.
Step 6. Practise the Wound-Care Sequence
Once the arm, removable elements, and pockets are ready, introduce the page to the children.
Begin by identifying the illustrated wound and discussing why an injured area may need to be covered. Children can then retrieve the dressing material, position it over the simulated wound, and use the bandage to practise securing it.
Encourage children to handle the arm, try the steps themselves, and return each item to its designated place after the activity.
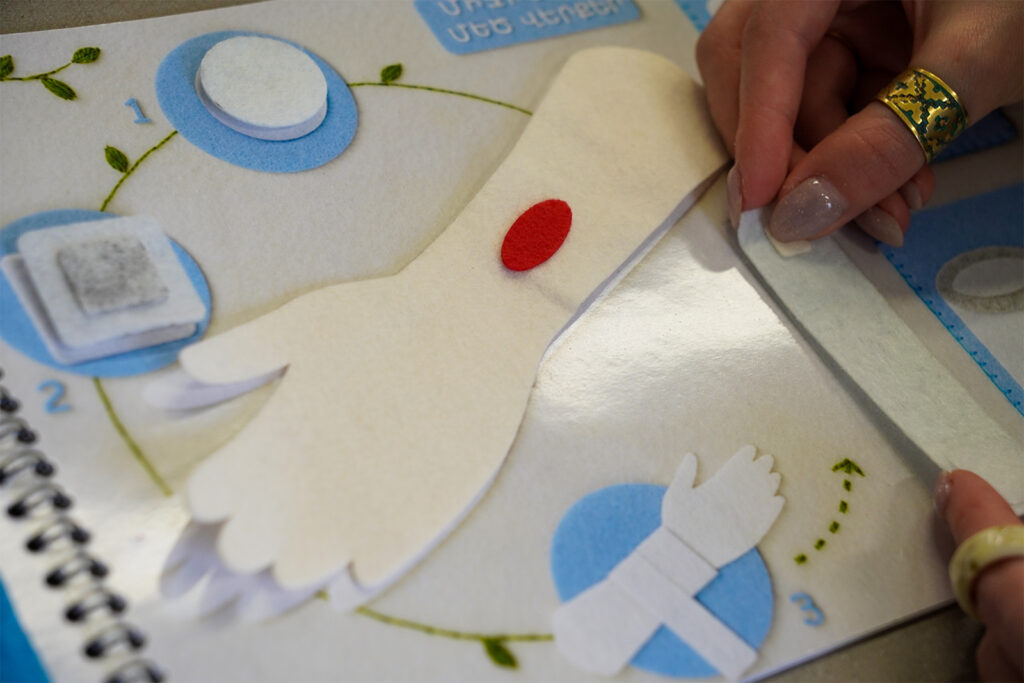
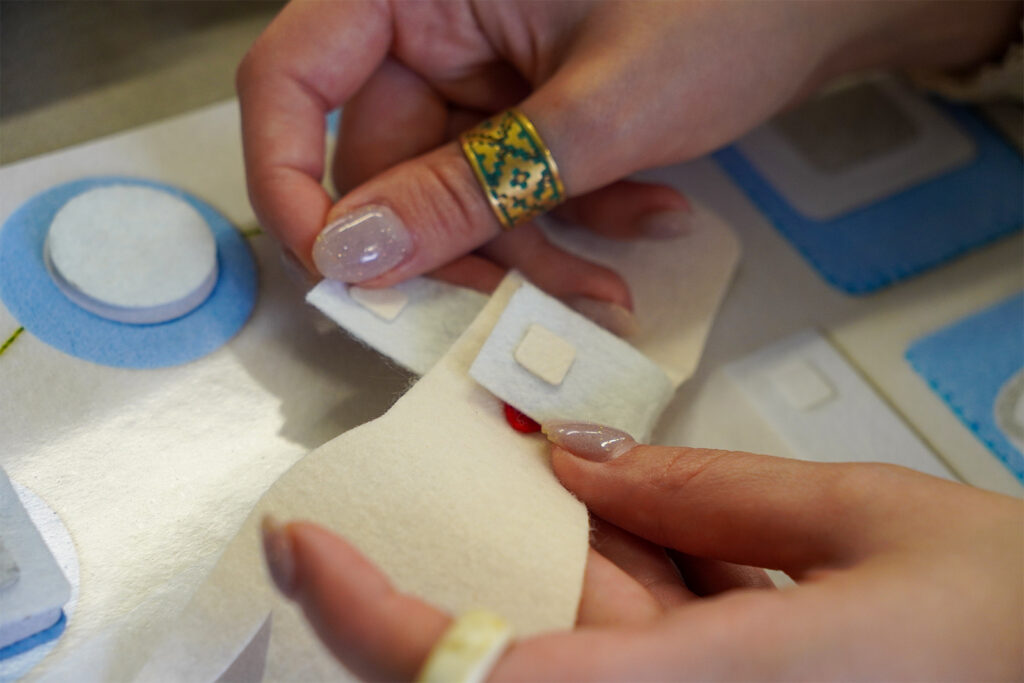
The purpose is to help children recognize first-aid materials and become familiar with the sequence of actions through guided, hands-on practice.
Safety note: This is an educational simulation, not a substitute for first-aid training. Use clean demonstration materials and never practise wound treatment on a real injury as part of the activity. Significant wounds require prompt assessment by a qualified medical professional. Adults should supervise the use of all materials and ensure the instructions are appropriate for the children's age group.
First Aid for Burns
The original Armenian title, Ճիշտ խնամք այրվածքների դեպքում, translates to Proper Care for Burns. Bottom text: The original Armenian title, Զգուշացիր տաք իրեր օգտագործելիս, translates to Be Careful When Handling Hot Objects. You can adapt the title and other text on the page using Adobe Photoshop or AI-assisted image-editing tools to create a version in your preferred language. Check the translated text before printing.
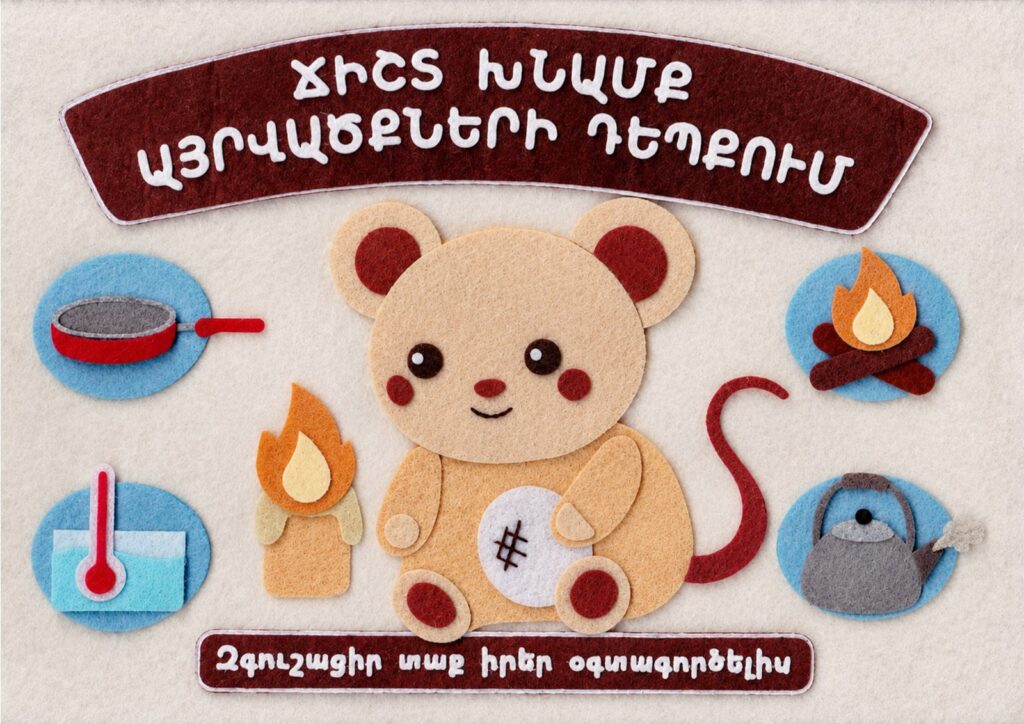
This page introduces children to situations involving heat and burns through colorful illustrations and a friendly felt character. Unlike the previous pages, the mouse is the only removable interactive element. The other illustrations remain part of the page design.
Step 1. Prepare the Mouse Cutting File
Open the first aid burns mouse EPS file.
Check the dimensions and cutting outlines. The design contains separate felt shapes for the mouse's body, head, ears, limbs, tail, and decorative details.
Choose your felt colors according to the reference image and make sure that each component is clearly identifiable before cutting.
Step 2. Laser-Cut the Felt Pieces
Prepare the felt sheets and confirm that the material is suitable for your laser cutter. Test the cutting settings on a scrap piece before processing the complete design.
Step 3. Assemble the Mouse
Arrange the felt pieces on a flat surface and use the reference image to guide the assembly.
- Create the main body. Position the body and head pieces, aligning them according to the design.
- Add the ears and facial details. Place the contrasting felt pieces for the ears, eyes, nose, and cheeks.
- Assemble the limbs and tail. Position the arms, legs, and tail to recreate the mouse's shape.
- Add the remaining details. Attach the belly and any other decorative elements included in the template.
- Glue the pieces together. Apply a thin layer of PVA glue or fabric glue to the areas that need to be joined. Avoid using too much glue, as it can soak through the felt or make it stiff.
- Allow the glue to dry. Follow the adhesive manufacturer's instructions before handling the finished character.
You can add embroidered details to give the mouse more personality. Use embroidery thread to create facial features or small decorative stitches where appropriate. This step is optional, so you can keep the character simple or personalize it with additional details.
Step 4. Attach the Mouse to the Book
To make the mouse removable, use self-adhesive square hook-and-loop fasteners.
- Attach one side of the fastener to the back of the finished mouse.
- Position the matching side on the designated area of the book page.
- Press the fasteners firmly into place, following the product instructions.
- Check that the mouse stays attached during handling but can be removed and reattached easily.
This allows children to take the character off the page, explore it, and return it to its place during the activity.
Step 5. Explore the Page
Once the mouse is ready, introduce the page by discussing the illustrations and the situations they represent.
Children can remove the mouse and interact with the character while exploring the page. The removable element adds a tactile component to the learning experience, helping children engage with the book beyond simply looking at the illustrations.
Burns: Types and First Aid
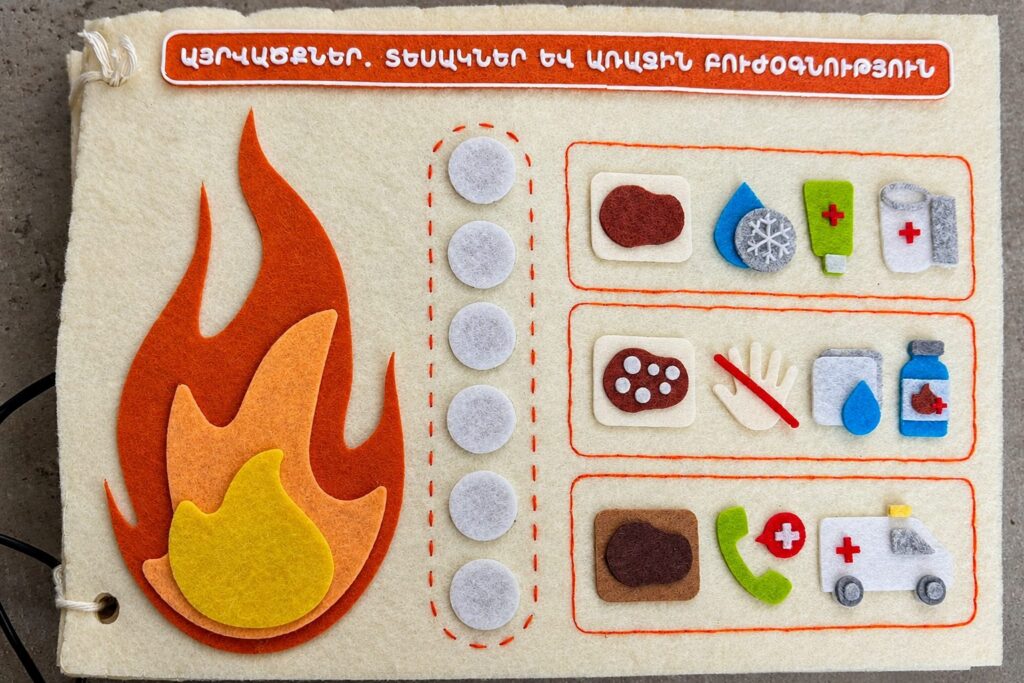
The original Armenian title, Այրվածքներ, տեսակներ և առաջին բուժօգնություն, translates to Burns: Types and First Aid.
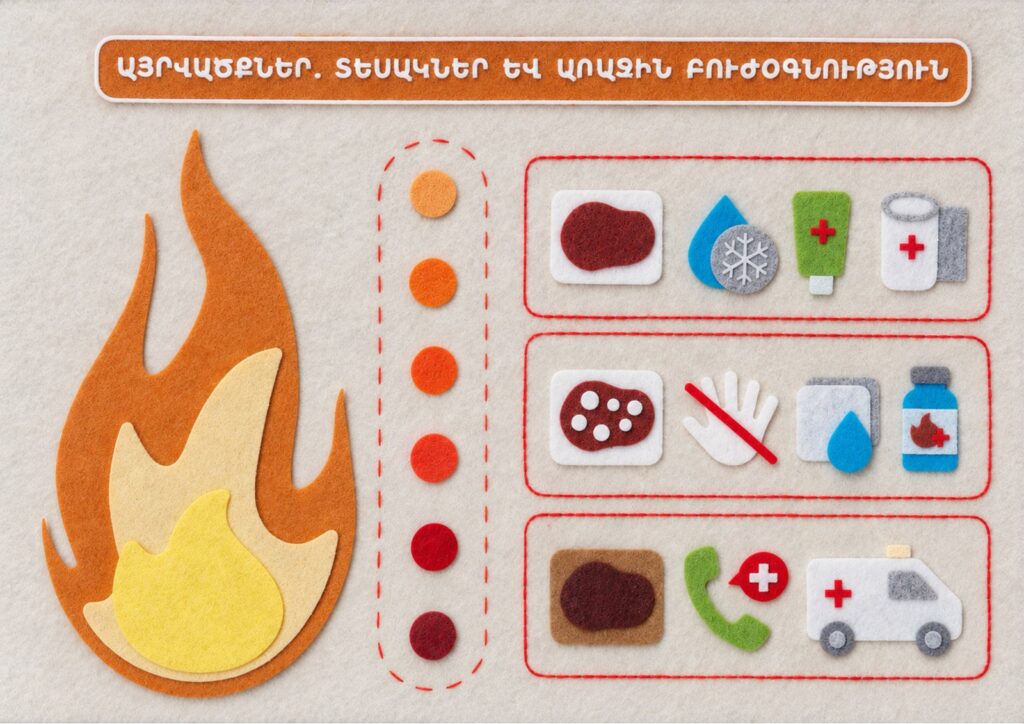
The page uses colorful illustrations to introduce children to different types of burns and basic first-aid responses. The flame illustration, color indicators, and grouped examples provide a visual starting point for discussing burns, their causes, and safety.
The original page is in Armenian, but you can adapt the title and other text to English or another language. Use Adobe Photoshop or other image-editing tools to replace the text, adjust the layout if necessary, and print the adapted version.
Explore the Page
Use the illustrations to guide a conversation with children about burns, their causes, and the importance of responding safely to an injury.
Encourage children to observe the images, identify the objects shown, and discuss why burns require appropriate care. An adult can explain the illustrated first-aid responses using age-appropriate language and reliable first-aid guidance.
This page can be printed and included in the book without creating additional interactive elements. You can also adapt or expand it with your own illustrations and activities.
Essential Items for an Earthquake
The original Armenian title, Քո անհրաժեշտ իրերը երկրաշարժի դեպքում, translates to Your Essential Items in Case of an Earthquake.
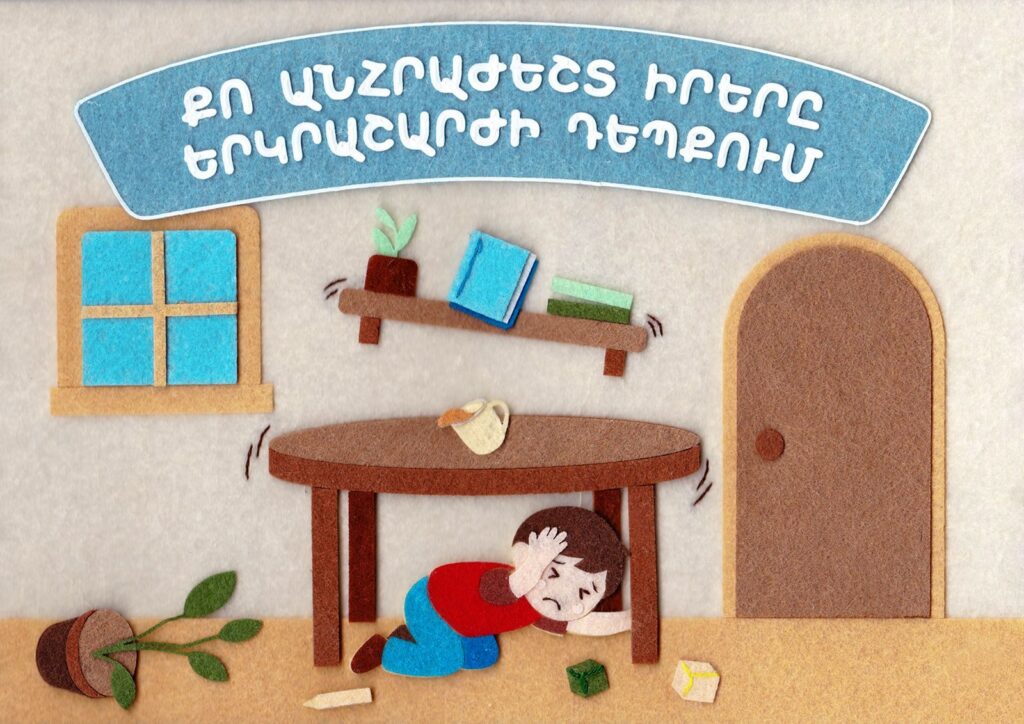
You can adapt the title and other text on the page using Adobe Photoshop or AI-assisted image-editing tools to create a version in your preferred language. Check the translated text before printing.
Emergency Kit: Essential Supplies
This page presents the main items to include in an emergency kit. It is ready to print and does not require any additional cutting or assembly.
The original labels are in Armenian, but you can adapt them to English or another language using Adobe Photoshop or other image-editing tools. Replace each label while preserving the layout, then print the updated page.
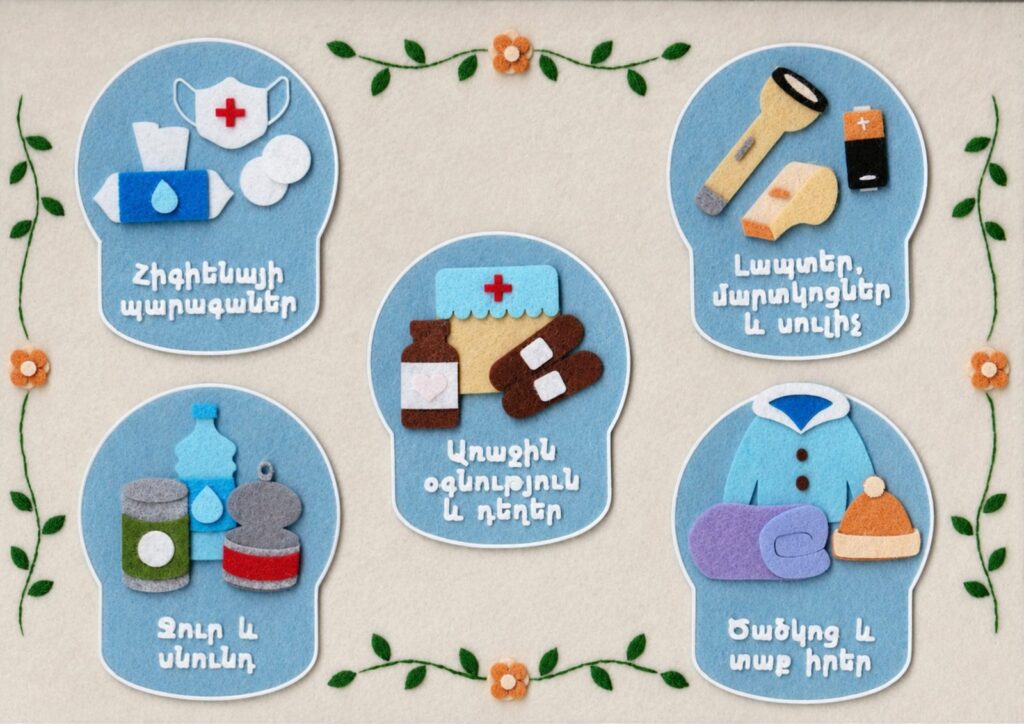
English Translations of the Labels
- Հիգիենայի պարագաներ — Hygiene Supplies
- Լապտեր, մարտկոցներ և սուլիչ — Flashlight, Batteries and Whistle
- Առաջին օգնություն և դեղեր — First Aid Supplies and Medicines
- Ջուր և սնունդ — Water and Food
- Ծածկոց և տաք իրեր — Blanket and Warm Clothing
These labels help children identify the essential items that may be needed in an emergency and understand how to prepare a basic emergency kit.
Protect Yourself from the Sun and Heat
The original Armenian title, Պաշտպանվիր արևից և շոգից, translates to Protect Yourself from the Sun and Heat.
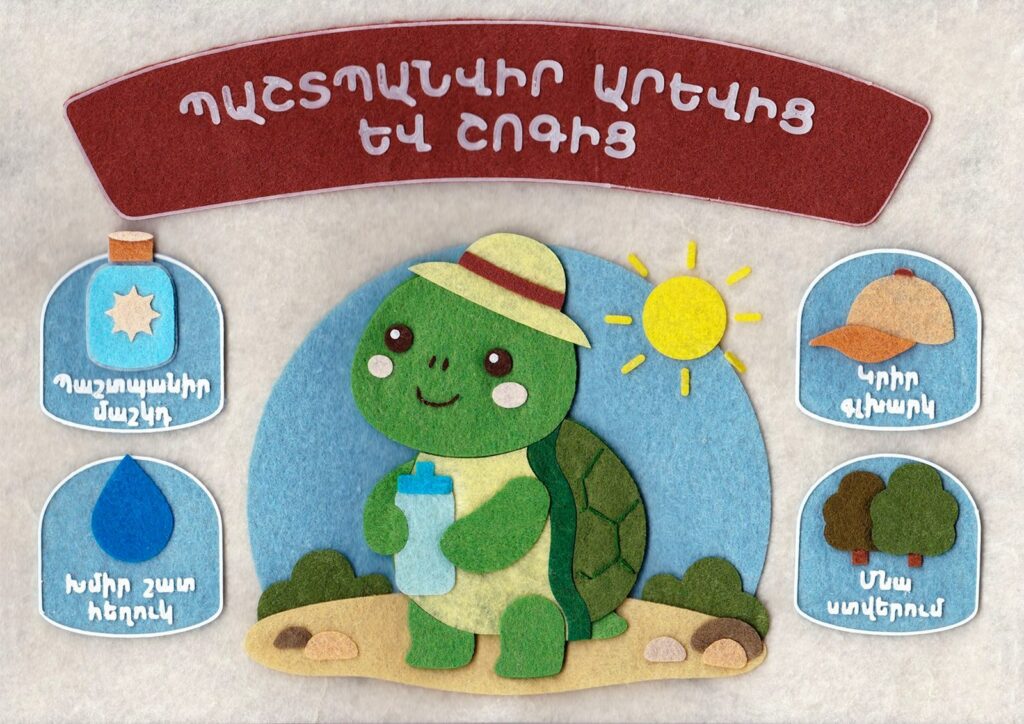
The page teaches children basic ways to protect themselves in hot weather through four illustrated recommendations:
- Պաշտպանիր մաշկդ — Protect your skin.
- Կրիր գլխարկ — Wear a hat.
- Խմիր շատ հեղուկ — Drink plenty of fluids.
- Մնա ստվերում — Stay in the shade.
The page background and instructions are ready to print. If you would like to create an English version, you can replace the Armenian title and labels using Adobe Photoshop or other image-editing tools, then print the adapted page.
Unlike the previous printable pages, this page also includes an interactive felt turtle that can be made separately and attached to the book.
Step 1. Prepare the Cutting File
Open the sun protection turtle EPS file. Check the dimensions and cutting outlines. The file contains the individual shapes needed to create the turtle, including its body, head, shell, legs, and decorative details.
Step 2. Laser-Cut the Felt
Check that your felt is suitable for your laser cutter and test the cutting settings on a scrap piece before cutting the complete design.
Step 3. Assemble the Turtle
Arrange the cut pieces on a flat surface and use the reference image to guide the assembly.
- Create the main body. Position the turtle's body, head, and legs according to the template.
- Add the shell. Place the shell pieces over the body, aligning them with the design.
- Assemble the face. Add the eyes, nose, mouth, and other small details.
- Add the remaining elements. Attach the decorative details included in the cutting file, such as the shell patterns and accessories.
- Glue the pieces together. Apply a thin layer of PVA glue or fabric glue where the layers need to be joined. Avoid excessive glue, which can soak through the felt or make it stiff.
- Allow the glue to dry. Follow the adhesive manufacturer's instructions before handling the finished turtle.
You can add small embroidered details to the turtle to personalize its appearance. This step is optional, so you can keep the design simple or add details according to your preferences.
Step 4. Attach the Turtle to the Book
To make the turtle removable, use self-adhesive square hook-and-loop fasteners.
- Attach one side of the fastener to the back of the finished turtle.
- Position the matching side on the designated area of the book page.
- Press the fasteners firmly into place, following the product instructions.
- Check that the turtle stays attached during handling but can be removed and reattached easily.
18. Protect Yourself from the Cold
The original Armenian title, Պաշտպանվիր ցրտից և ցրտահարությունից, translates to Protect Yourself from the Cold and Frostbite.

The page illustrates four simple ways to stay warm during cold weather:
- Մնա տաք վայրում — Stay in a warm place.
- Կրիր շարֆ — Wear a scarf.
- Կրիր գուլպաներ — Wear socks.
- Կրիր ձեռնոցներ — Wear gloves.
The page background and illustrations are ready to print. You can adapt the Armenian title and labels to English or another language using Adobe Photoshop or other image-editing tools. Replace the text, adjust the layout if necessary, and print the adapted version.
The page also includes a removable felt rabbit, which can be created using the provided EPS cutting file and attached to the book.
Step 1. Prepare the Cutting File
Open the cold weather rabbit EPS file.
Check the dimensions and cutting outlines. The file contains the shapes needed to assemble the rabbit, including its body, head, long ears, arms, legs, and other details.
Step 2. Laser-Cut the Felt
Check that your felt is suitable for your laser cutter and test the cutting settings on a scrap piece before cutting the full design.
Step 3. Assemble the Rabbit
Use the reference image to guide the placement of the felt pieces.
- Create the body and head. Position the main body and head shapes according to the template.
- Attach the ears. Place the contrasting inner-ear pieces on the long outer-ear shapes before joining them to the head.
- Add the face. Position the eyes, nose, cheeks, and other facial details.
- Assemble the limbs and clothing. Add the arms, legs, scarf, and any other components included in the design.
- Glue the layers. Apply a thin layer of PVA glue or fabric glue where the pieces need to be joined. Avoid excessive glue, which can soak through the felt or make it stiff.
- Allow the glue to dry. Follow the adhesive manufacturer's instructions before handling the finished rabbit.
You can add small embroidered details to personalize the rabbit, such as facial features or decorative stitches on its clothing. This step is optional, so you can keep the design simple or add details according to your preferences.
Step 4. Attach the Rabbit to the Book
To make the rabbit removable, use self-adhesive square hook-and-loop fasteners.
- Attach one side of the fastener to the back of the finished rabbit.
- Position the matching side on the designated area of the book page.
- Press the fasteners firmly into place, following the product instructions.
- Check that the rabbit stays attached during handling but can be removed and reattached easily.
19. Insects and Small Pests to Recognize
This page introduces children to several small creatures that may bite or sting. The original Armenian title, Միջատներ, որոնց պետք է ճանաչել ու զգուշանալ, can be translated as Insects and Small Pests to Recognize and Avoid.
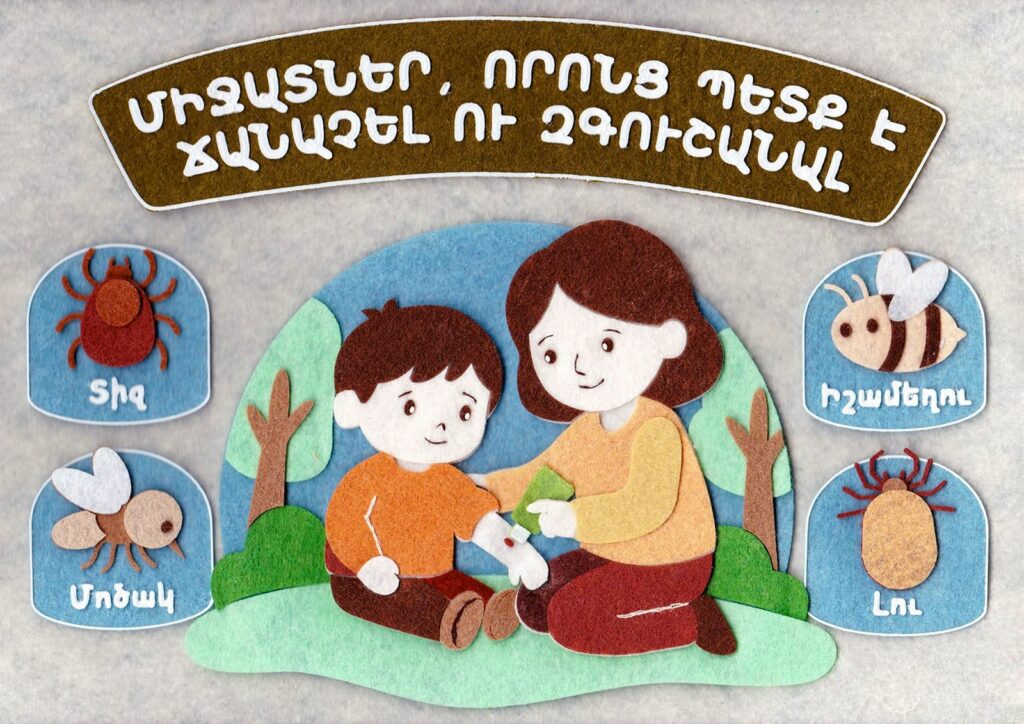
The illustrations include:
- Տիզ — Tick
- Մոծակ — Mosquito
- Իշամեղու — Bombus
- Լու — Flea
The page is ready to print and does not require any additional cutting, assembly, or interactive elements.
If you would like to create an English version, you can replace the Armenian title and labels using Adobe Photoshop or other image-editing tools. Adjust the text to fit the layout, check the translations, and print the adapted page.
20. Discover the World of Plants and Fungi
The original Armenian title, Բացահայտիր բույսերի և սնկերի աշխարհը, translates to Discover the World of Plants and Fungi.
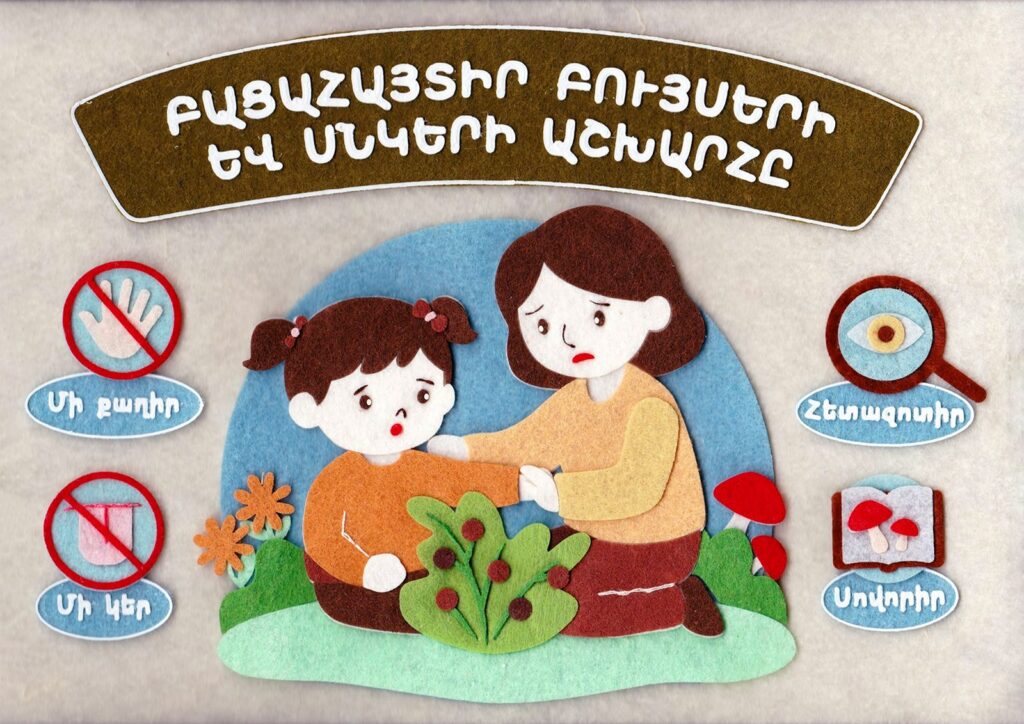
The page illustrates four simple safety messages:
- Մի՛ քաղիր — Do not touch.
- Մի՛ կեր — Do not eat.
- Հետազոտիր — Explore
- Սովորիր — Learn.
The page is ready to print and does not require any additional cutting, assembly, or interactive elements.
If you would like to create an English version, you can replace the Armenian title and labels using Adobe Photoshop or other image-editing tools. Adjust the text to fit the layout, check the translations, and print the adapted page.
21. Printable Illustration: An Open Page for Creativity
A decorative illustration featuring two children under a starry sky.
This page is ready to print and use in the book. No additional cutting, assembly, or interactive elements are required.

The illustration can be used as provided, or adapted to suit your own version of the book. If you would like to make the page more interactive, you can add felt details, removable elements, or other creative features using the techniques described in this documentation.
This page offers an opportunity to personalize the book and experiment with new ideas while keeping the original design as a starting point.
Advanced Techniques and Extra Knowledge: Touch Pressure LED Board
A milled PCB with a XIAO ESP32-C3, a round copper touch pad and six LEDs, one at the end of each arm. The harder you press the pad, the more LEDs light up.
- XIAO ESP32-C3
- Analog touch sensing
- 100 kΩ + 0.1 µF on D0
- 6 LEDs · D2–D7
- Arduino IDE
Milled copper PCB with a XIAO ESP32-C3, a round touch pad in the corner, and six arms each ending in an SMD LED.
The finished board: touch pad bottom left, LEDs at the tips of the arms.
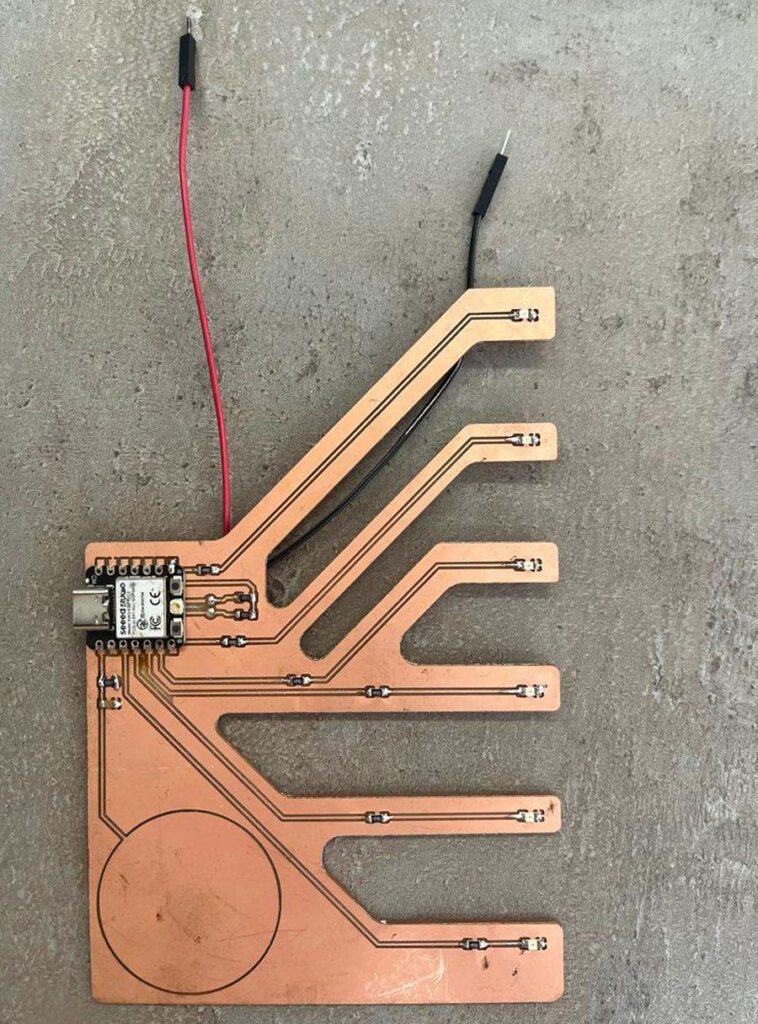
Components and wiring
| Pin | Connected to | Role |
|---|---|---|
| D0 | Touch pad, 100 kΩ resistor and 0.1 µF capacitor in parallel | Analog touch input (GPIO2) |
| D2 | LED 1 + 499 Ω | Light touch |
| D3 | LED 2 + 499 Ω | |
| D4 | LED 3 + 499 Ω | Medium press |
| D5 | LED 4 + 499 Ω | |
| D6 | LED 5 + 499 Ω | |
| D7 | LED 6 + 499 Ω | Hardest press |
| BOOT | On-board button (GPIO9) | Recalibrate the pad |
Making the board
- Design. Schematic and PCB layout in KiCad. The touch pad is a large copper circle isolated by a single engraved ring, and the board outline was drawn as a custom shape with one arm per LED.
- Milling. Toolpaths generated in Mods. The traces were isolation-milled on a single-sided copper board, then the outline was cut.
- Soldering. The XIAO is soldered flat onto SMD pads, followed by the SMD resistors and LEDs.
- Testing. The D0 readings were checked in the Arduino Serial Plotter.
How the touch sensing works
The ESP32-C3 has no built-in touch peripheral, so the pad is read as an analog input. Three parts share the D0 node:
| Part | Job |
|---|---|
| Touch pad | Copper circle on the board that the finger presses |
| 100 kΩ | Holds D0 at a steady level when nobody touches the pad |
| 0.1 µF | Smooths noise on D0 |
Touching the pad changes the voltage on D0. Pressing harder gives a larger skin contact area and a larger change, so the size of the change is used as the pressure value. D0 is read with analogReadMilliVolts, so the signal is in millivolts.
Programming
Written in the Arduino IDE. Settings: board XIAO_ESP32C3, and Tools → USB CDC On Boot: Enabled, so Serial goes over USB instead of pins D6/D7, which drive two of the LEDs.
What the code does
- Calibration: at power-up one LED sweeps back and forth for 1 second while the untouched level on D0 is measured. The code also works out whether touching raises or lowers D0. All LEDs flash twice when it is ready.
- Measuring: every reading averages the ADC over 20 ms, one 50 Hz mains period, which cancels mains hum.
- Mapping: the change from the untouched level, in mV, is mapped to 0–6 LEDs. Hysteresis stops the LEDs flickering at the boundaries.
- Adapting: the code learns your hardest press, follows slow drift while the pad is untouched, and recalibrates when you press BOOT.
Core of the code
Copy
// Average the ADC over one mains period -> 50 Hz pickup cancels out
float readTouch() {
  uint32_t sum = 0, n = 0;
  uint32_t t0 = micros();
  do {
    sum += analogReadMilliVolts(TOUCH_PIN);
    n++;
  } while (micros() - t0 < AVG_WINDOW_US);
  return (float)sum / n;
}

// In loop(): change from the untouched level -> number of LEDs
filtered += (readTouch() - filtered) * SMOOTHING;
float signal = direction * (filtered - baseline);   // mV, > 0 when pressed

float pos = (signal < TOUCH_MV)
          ? signal / TOUCH_MV
          : 1 + (signal - TOUCH_MV) / (fullScale - TOUCH_MV) * (NUM_LEDS - 1);
pos = constrain(pos, 0.0f, (float)NUM_LEDS);
Tuning values at the top of the sketch: TOUCH_MV sets how much change lights the first LED, and FULL_SCALE_MV sets the starting range for all six.
Full code: touch_pressure_leds.ino
Copy
/*
  Touch-pressure LED bar  -  Seeed Studio XIAO ESP32C3
  ====================================================
  Touch pad -> D0 (GPIO2 / ADC1_CH2), 100k and 0.1uF on the same node
  LEDs      -> D2 D3 D4 D5 D6 D7   (light press ... hard press)

  Principle
    The ESP32-C3 has no capacitive-touch peripheral, so the pad is read
    resistively: the fingertip bridges the pad and acts as a variable
    resistor against the 100k. Press harder -> larger contact area ->
    lower skin resistance -> bigger voltage change on D0.
    The 0.1uF filters the node, and every reading is averaged over exactly
    one mains period (20 ms), so 50 Hz hum averages out.

  What the sketch does
    1. Measures the untouched level at power-up (LED sweep = don't touch).
    2. Works out by itself whether pressing pulls D0 up or down.
    3. Smooths the reading and uses hysteresis so the LEDs don't flicker.
    4. Learns your hardest press and spreads the 6 LEDs over that range.
    5. Slowly follows baseline drift (humidity, temperature) while untouched.
    6. Press the BOOT button at any time to recalibrate.

  Arduino IDE: board "XIAO_ESP32C3", Tools > USB CDC On Boot: Enabled
  (otherwise Serial runs on D6/D7, which are two of your LEDs).
  Serial Plotter @ 115200 shows: signal, threshold, fullScale, leds.
*/

// ------------------------------- Pins -------------------------------
const uint8_t TOUCH_PIN  = D0;                         // GPIO2, ADC1_CH2
const uint8_t LED_PINS[] = { D2, D3, D4, D5, D6, D7 }; // in order of pressure
const uint8_t NUM_LEDS   = sizeof(LED_PINS) / sizeof(LED_PINS[0]);
const uint8_t CAL_BUTTON = 9;                          // on-board BOOT button (GPIO9)
const uint8_t LED_ON     = HIGH;                       // swap these two if the LEDs
const uint8_t LED_OFF    = LOW;                        // are wired to 3V3 (active-low)
// Note: D6 = GPIO21 = UART0 TX, so that LED may blink briefly at reset (boot log).

// ------------------------------ Tuning ------------------------------
const uint32_t AVG_WINDOW_US  = 20000;  // one 50 Hz period (use 16667 for 60 Hz)
const float    SMOOTHING      = 0.3;    // 0..1, lower = smoother but slower
const float    TOUCH_MV       = 40;     // mV away from baseline that lights LED 1
const float    FULL_SCALE_MV  = 400;    // mV that lights all LEDs (start value)
const bool     LEARN_MAX      = true;   // grow full scale to fit your hardest press
const float    TOP_LED_AT     = 0.85;   // all LEDs on at 85 % of the hardest press
const float    HYSTERESIS     = 0.35;   // fraction of an LED step needed to drop a level
const float    BASELINE_DRIFT = 0.003;  // baseline tracking rate while untouched (~7 s)
const float    ADC_MAX_MV     = 2500;   // usable C3 ADC range at default attenuation
                                        // (if pressing LOWERS D0, light touches between
                                        //  3.3 V and ~2.5 V are above range and won't show)

// ------------------------------ State -------------------------------
float baseline  = 0;   // untouched level, mV
float filtered  = 0;   // smoothed reading, mV
float fullScale = FULL_SCALE_MV;
int   direction = 1;   // +1: pressing raises D0, -1: pressing lowers D0
int   level     = 0;   // number of LEDs lit

// Average the ADC over one mains period -> 50 Hz pickup cancels out
float readTouch() {
  uint32_t sum = 0, n = 0;
  uint32_t t0 = micros();
  do {
    sum += analogReadMilliVolts(TOUCH_PIN);
    n++;
  } while (micros() - t0 < AVG_WINDOW_US);
  return (float)sum / n;
}

void showBar(int n) {                      // LEDs 1..n on, rest off
  for (uint8_t i = 0; i < NUM_LEDS; i++)
    digitalWrite(LED_PINS[i], i < n ? LED_ON : LED_OFF);
}

void showDot(int k) {                      // only LED k on
  for (uint8_t i = 0; i < NUM_LEDS; i++)
    digitalWrite(LED_PINS[i], i == k ? LED_ON : LED_OFF);
}

void calibrate() {
  Serial.println("Calibrating - keep your finger off the pad...");
  const int N    = 50;                     // 50 x 20 ms = 1 s
  const int span = 2 * (NUM_LEDS - 1);
  float sum = 0;
  for (int i = 0; i < N; i++) {
    int p = (i / 2) % span;                // ping-pong sweep while measuring
    showDot(p < NUM_LEDS ? p : span - p);
    sum += readTouch();
  }
  baseline  = sum / N;
  filtered  = baseline;
  level     = 0;
  direction = (baseline > ADC_MAX_MV / 2) ? -1 : 1;

  // Keep the start-up full scale inside the available ADC headroom
  float headroom = (direction > 0) ? ADC_MAX_MV - baseline : baseline;
  fullScale = fminf(FULL_SCALE_MV, 0.9f * headroom);
  fullScale = fmaxf(fullScale, 2 * TOUCH_MV);

  Serial.printf("Baseline %.0f mV -> pressing should %s D0, full scale %.0f mV\n",
                baseline, direction > 0 ? "RAISE" : "LOWER", fullScale);
  if (baseline > 300 && baseline < 2000)
    Serial.println("Warning: baseline is mid-range. Was the pad touched? Press BOOT to redo.");

  for (int i = 0; i < 2; i++) {            // double flash = ready
    showBar(NUM_LEDS); delay(120);
    showBar(0);        delay(120);
  }
}

void setup() {
  Serial.begin(115200);
  for (uint8_t i = 0; i < NUM_LEDS; i++) pinMode(LED_PINS[i], OUTPUT);
  pinMode(CAL_BUTTON, INPUT_PULLUP);
  delay(200);                              // let the 0.1uF node settle
  calibrate();
}

void loop() {
  if (digitalRead(CAL_BUTTON) == LOW) {    // BOOT pressed -> recalibrate
    while (digitalRead(CAL_BUTTON) == LOW) delay(10);
    calibrate();
  }

  filtered += (readTouch() - filtered) * SMOOTHING;
  float signal = direction * (filtered - baseline);   // mV, > 0 when pressed

  if (LEARN_MAX && signal * TOP_LED_AT > fullScale)
    fullScale = signal * TOP_LED_AT;

  // Continuous position: TOUCH_MV -> 1 LED ... fullScale -> all LEDs
  float pos = (signal < TOUCH_MV)
            ? signal / TOUCH_MV
            : 1 + (signal - TOUCH_MV) / (fullScale - TOUCH_MV) * (NUM_LEDS - 1);
  pos = constrain(pos, 0.0f, (float)NUM_LEDS);

  // Hysteresis: step up as soon as a boundary is crossed,
  // step down only once clearly below it
  if ((int)pos > level)              level = (int)pos;
  else if (pos < level - HYSTERESIS) level = (int)(pos + HYSTERESIS);

  showBar(level);

  // Follow slow drift only while nobody is touching
  if (level == 0 && signal < TOUCH_MV / 2)
    baseline += (filtered - baseline) * BASELINE_DRIFT;

  Serial.printf("signal_mV:%.0f threshold:%.0f fullScale:%.0f leds:%.0f\n",
                signal, TOUCH_MV, fullScale, level * fullScale / NUM_LEDS);
}
Result
With nothing touching the pad, all LEDs are off. A light touch lights D2, and pressing harder adds D3, D4 and so on up to all six. Releasing turns them off again in reverse order.
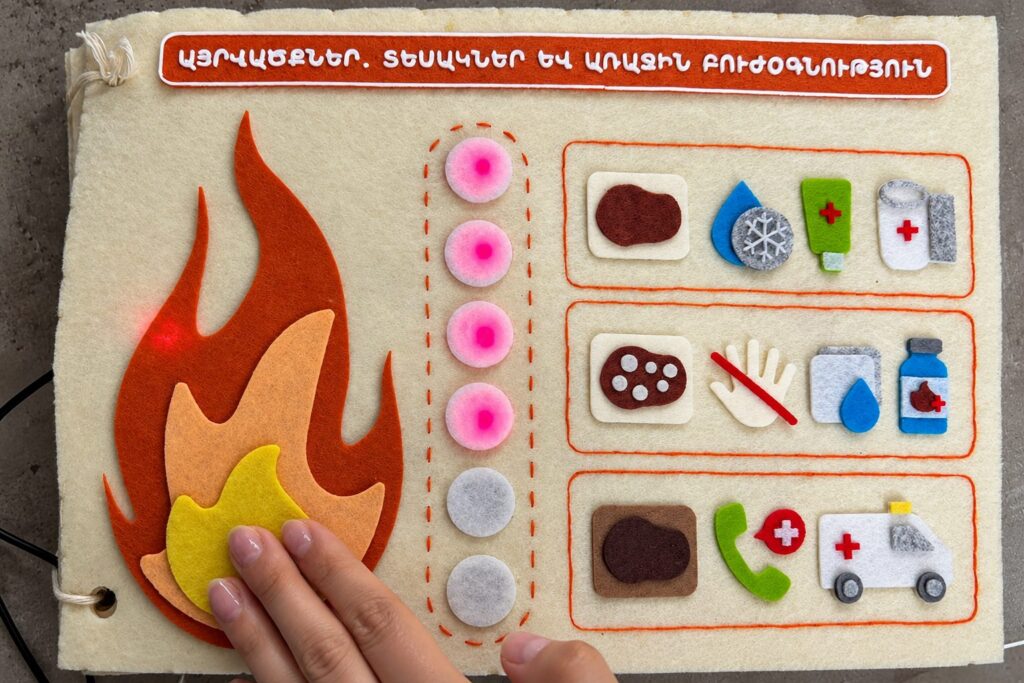
The pad detects both touch pressure and duration. The harder you press, the more LEDs light up, giving visual feedback on touch intensity.
Conclusion
The ESP32-C3 has no touch peripheral, but one analog pin with a resistor and a capacitor was enough to turn the pad into a simple pressure sensor. Two things made it reliable: averaging each reading over one mains period to remove 50 Hz noise, and measuring the untouched level at startup so the LEDs stay off when nobody touches the pad.
Files for download
touch_pressure_leds.ino— Arduino code for the boardtouch_board.jpg— Board photo, web size
Fab Academy documentation · licensed CC BY-NC 4.0